
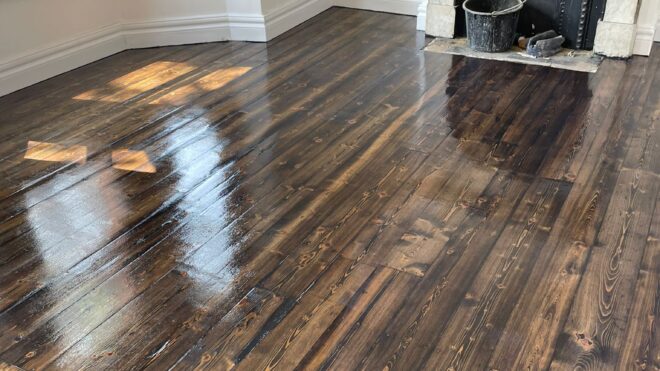
Check Out The Complete Guide To Sanding Floors in Coastal and City Homes
Floors take the brunt of daily life – muddy shoes, salty air, kids running through the kitchen, and even the dampness of an Irish winter. Over time, all this leaves marks. Some you can clean away, but others slowly eat into the finish and shorten the life of your boards.
So how do you protect your boards in Ireland’s mix of coastal damp, urban grit, and shifting seasons?
Environmental Forces Acting on Your Floors
The Coastal Load
Ireland’s coastline has its unique challenges. Sea air contains marine aerosol loaded with hygroscopic salts. Those salts attract moisture and leave a light, sticky film on surfaces. That film grabs dirt, dulls finishes, and can hold extra damp near thresholds and windows. If your home faces the sea, you’ll see more frequent dulling near doors and windward rooms.
Wind drives rain sideways. Ireland’s Driving Rain Index maps the strongest zones for wind‑blown rain, so houses near the Atlantic and Irish Sea get hit hardest. These exposures raise exterior wetting and increase the chance of moisture paths through weak points like door sills, weep holes, old seals, and poorly flashed window heads.
Humidity also runs higher along the coast during stormy spells. Because salts are hygroscopic, small deposits can keep surfaces damp longer after rain. That matters for sanding. Sand too soon after a wet spell and your boards may still be above a safe moisture range, even if the room air feels comfortable.
Effects of the Salt, Wind, and Rain
Cupping after wet weeks, dull patches near doors, and salty streaks by patio thresholds are common in coastal homes. The cause is a mix of wind‑driven rain, salt deposition, and micro leaks at sills and door bottoms. Moisture rises through boards near edges, then evaporates slowly because salt film holds damp. If you sand and seal without fixing the water path, the problem returns.
Another coastal headache is finish whitening in cold, damp rooms, especially on tight‑grained species where waterborne finishes can blush if conditions are marginal. That often points to high RH during coating or insufficient airflow during cure. Finally, metals near the floor—like door stops and screws—can show faster corrosion in salty air. That’s a clue that salts are present on nearby timber too.
For coastal homes before any sanding:
- Wash entryways and windward floors more often to remove salts.
- Inspect thresholds, sills, and door bottoms for water tracks. Fix these first.
- It’s recommended to log room relative humidity (RH) for at least two weeks. Stabilise within a sensible band before you book work.
The City Load: Particles, Grit, and Footfall Intensity
City living is tough on wooden floors. Every step you take brings in tiny abrasives that slowly wear them down. It’s not just big scuffs you need to worry about – it’s the constant grind of dust, grit, and fine particles acting like sandpaper. Over time, this dulls the finish, weakens slip resistance, and leaves obvious wear patterns.
Think about the busiest spots in your home. The route from the front door to the kitchen often develops a visible lane within a couple of years. Chairs scraping back and forth in the dining area create hazy patches. Children dragging scooters or dropping heavy schoolbags at the same spot day after day leave scuff marks that no amount of mopping will hide. Even pushchairs and prams can track grit that scratches the finish little by little.
The fix is not just “harder wood.” It’s better grit control, smarter finish choice, and timely maintenance coats. Entry mats cut the problem dramatically, but many homes use short mats that don’t grab enough grit. A two‑stage entry (outdoor scraper + indoor textile mat) works far better.
Kitchen‑adjoining living spaces also take a beating. Oil aerosols from cooking settle as fine film, then bind dust. That adds extra abrasion underfoot. Combine this with prams, pushchairs, and sports bags, and you get a greyish lane within two years on busy routes if the finish isn’t maintained.
Action points for city homes before any sanding:
- Fit proper entry mats inside and outside. Vacuum them often.
- Vacuum hard floors with a machine that has a HEPA filter. Avoid dry sweeping.
- Plan to recoat on a realistic cadence. A fresh topcoat resists abrasion much better than a tired film.
Seasonal swings and storms
Strong winds and wind‑driven rain increase in autumn and winter, then ease in late spring and early summer. These swings change indoor RH and, by extension, wood moisture.
Why does that matter? Sanding during an unstable, wet period invites cupping and cloudy finishes. Planning during a more stable window reduces risk. You can still sand in winter, but you’ll need active RH control and more patient drying between coats.
Moisture Factor During Floor Sanding
Wood is always trying to balance itself with its surroundings. The technical term is equilibrium moisture content (EMC). In simple terms, it just means your floorboards will absorb or release moisture depending on the room’s temperature and humidity. If the air is damp, the boards take in moisture and swell. If the air is too dry, they lose moisture and shrink.
For good sanding results, your aim is a steady indoor environment. In Irish homes, that usually means keeping the relative humidity (RH) somewhere around 45–55% in the two weeks leading up to the job. This middle range helps the boards stay stable so they don’t expand or contract dramatically once the finish goes on. If your home normally sits outside that band, you may need to adjust things with better ventilation, a dehumidifier, or even a humidifier depending on the season.
Your focus here is consistency, not chasing a perfect number on the meter. When conditions swing up and down, the wood moves with them, and that’s when problems start. If you skip moisture control, you risk floors that cup at the edges, develop wide gaps, or end up with a cloudy, uneven finish after coating. A little preparation goes a long way towards avoiding those headaches.
Subfloor/screed Moisture Thresholds
Your floorboards might look dry on the surface, but what sits beneath them often tells a different story. Subfloors and screeds can trap moisture for months, slowly releasing it upwards. If you sand or coat on top of a damp base, you’re setting yourself up for problems later – finishes can fail, boards can warp, and staining can appear when you least expect it.
That’s why professionals always measure moisture before starting. For timber floors, the safe level is generally 65% relative humidity (RH) or lower, tested with an in-situ hygrometer. For resilient or textile coverings, the limit is usually a bit higher, around 75% RH. These numbers aren’t random. Wood reacts strongly to even small moisture changes, so a slab sitting at 75% RH under a timber floor is already risky, especially in Ireland’s windy, wet climate.
If your readings come back high, it doesn’t mean you can’t sand – it means you need a plan. The first step is finding and stopping the source of moisture. It could be a small leak, poor drainage outside, or condensation building up indoors. Sometimes the fix is as simple as running a dehumidifier for a few weeks; other times it means repairing seals or installing a proper damp-proof membrane (DPM) before going ahead with new floors.
For refinishing jobs, the priority is clear: deal with the water path before you pick up a sander. Otherwise, the same damp that caused issues in the first place will simply come back through your newly treated surface. Think of it this way – you’re not just preparing the floor you can see, you’re preparing the layers you can’t. Get those right, and the results will last far longer.
Why Timing the Sand Matters
As we’ve said, wood seeks equilibrium moisture content with the room air. When the room is wetter, the wood gets wetter, and vice-versa.
For example, at around 20 °C and 60% RH, wood EMC sits near 11%. Drop RH to 40% and EMC falls to roughly 8%. That difference changes board width enough to expose seams or flatten cupping. If you sand boards while they are artificially dry and they later pick up moisture, edges can swell and the surface can ripple.
What that means at home: if your hygrometer shows room RH swinging from the low 40s to the high 60s, your wood is expanding and shrinking every week. Sanding during a temporary dry spell can leave ridges when humidity rebounds.
What to do: log RH and temperature for at least two weeks. Aim for a stable indoor band (e.g., 45–55% RH) with gentle daily swings.Sanding during that steady window gives you a flatter, cleaner result.
Wind‑driven Rain & Building Envelope Leakage Risk
When wind pushes rain onto a façade, water can reach places it shouldn’t—through hairline cracks, tired seals, or clogged weep holes. Before sanding near those walls, check:
- Door and threshold seals for tracks or staining.
- Upstand flashings and sill end dams.
- Weep holes, air bricks, and drainage paths.
If these paths are compromised, fix them first. Otherwise, new finish can haze, whiten, or peel prematurely at those edges.
Assessing Your Floor Before Sanding
We’ll look at a broader aspect of things to consider, and you can pick those that match your particular situation. Of course, this also comes down to the kind of equipment you have in your household.
Coastal checklist
Start outside, then move in.
Exterior: Look for staining under sills, cracked sealant, and discoloured masonry near window heads. Check that weep holes are open. If your door sits low, confirm there’s a continuous seal and a proper threshold that sheds water.
Entry: Lift or remove the inner threshold if possible and check the underside for water marks. Salt crystals around screws or plates tell you sea air is depositing chlorides indoors. Measure room RH and temperature on the windward side and compare to the leeward side. The windward room is often damper after storms.
Interior: Map moisture around perimeters with a pin or pinless meter set for your species. Mark readings on a simple plan and retest after 48 hours. If numbers fall as rooms dry, wait. If they don’t, hunt for leakage. Record photos of meter screens so you have a dated trail.
Before booking: Stabilise RH, clean salt residues, and test the subfloor. Only then choose the floor sanding date.
City checklist
City homes are often drier but dirtier. Focus on abrasion control.
Entry: Measure the length of your matting. You need a few steps on the indoor mat to capture grit. A short mat looks tidy, but it doesn’t perform well. Add an outdoor scraper mat so most grit never reaches the finish.
Dust load: Vacuum skirtings and under furniture with a HEPA‑filtered machine. Dry sweeping throws fine dust back into the air where it will settle and scratch.
Wear mapping: In daylight, kneel and sight across the surface. You’ll see micro‑scratches in lanes and under chairs. Tape off sample squares in a hidden spot and perform a small screen‑and‑recoat test if you are unsure whether a full sand is needed. If a maintenance coat lifts clarity and hides micro‑scratches, you can postpone resanding.
Before booking: Reduce dust at the source, plan for proper entry mats, and choose a coating system that tolerates regular recoats.
Subfloor testing and documentation
Professional contractors document moisture. You can copy that process. Use an in‑situ hygrometer box or a calibrated probe kit and follow manufacturer instructions. Record:
- Date, room, location of each test.
- RH, temperature, and the meter’s serial number.
- Photos of the readings.
Keep these in a simple file. If anything goes wrong later, you have an evidence trail. It also helps you compare rooms and pick the safest sequence for sanding.
How Floor Sanding Changes by Location
Fancy a DIY job? This part is for you. However, it is always recommended that you hire a professional to carry out the sanding, due to the sheer workload involved and amount of risks.
For coastal homes
Coastal boards often carry small amounts of salt and may be slightly damp after storms. Go gentler on the first cut to protect the wear layer. Spend more time on edge drying between passes, especially near doorways and windward walls. Avoid trapping residual moisture under dense, low‑permeability films if the room RH is still volatile.
If you plan to stain, be cautious with water popping in rooms that hold damp. A uniform wetting step can help colour evenness, but only if the room can dry predictably. Test on a small area and check for any blush under waterborne coatings during cure. Dehumidify if RH rises during finishing.
Finally, protect stair nosings and thresholds. These spots get extra salt and water. Mask metal fixings to prevent corrosion from sanding dust mixed with salt residues.
For city homes
Urban floors typically need more aggressive correction in traffic lanes. Start with a heavier first cut where abrasion is deepest, then blend with the rest of the field so you don’t dish the surface. Vacuum thoroughly between grits. Fine, gritty dust left on the floor behaves like loose abrasive and will scratch under the next pass.
Chair zones and kitchens often benefit from a slightly finer final grit to reduce swirl visibility. If you plan a dark stain, run controlled samples with different final grits to balance colour depth against clarity. In busy, gritty homes, favour abrasion‑resistant topcoats and plan a recoat timetable at the outset.
Universal controls
No matter where you live:
- Confirm wood moisture with a calibrated meter before the final coat.
- Run proper dust extraction. Wood dust harms lungs and can breach occupational limits.
The professional floor sanding contractors already have this gear. If you go the DIY route, you would need to rent the equipment, since outrightly purchasing it is not feasible. However, even renting is still an additional expense, also keeping in mind that the quality of results may not be up to par. Getting pros to take on the task is easter for your peace of mind.
Finish Systems After the Floor Sanding Process
You choose between film‑forming finishes (like waterborne polyurethane) and penetrating systems (like hardwax oils). Each has trade‑offs in permeability, hardness, appearance, odour, and maintenance.
- Two‑component (2K) waterborne polyurethanes cure by crosslinking, giving higher film hardness and chemical resistance with lower smell and quicker reoccupancy compared to many solvent systems.
- Hardwax oils soak in and leave a micro‑film. They look natural and are easy to spot‑repair, but they need top‑ups and more disciplined cleaning. Expect to refresh high‑traffic paths more often.
Coastal picks
Coastal rooms demand finishes that tolerate salt, fluctuating RH, and occasional damp. A 2K waterborne polyurethane performs well here because of its hardness and lower permeability. It resists scuffing from wind‑blown grit and cleans up easily. Use a matte or extra‑matte sheen to hide small scratches from sandy residues.
In traditional buildings where breathability is part of the conservation strategy, a penetrating oil or hardwax oil can make sense. It allows some vapour movement and is easy to repair after small salt stains. The trade‑off is more frequent care. Plan seasonal top‑ups and keep salt out with disciplined cleaning. Stairs and thresholds deserve extra coats or a tougher film finish even if the rest of the house uses oil.
When staining in coastal homes, spray or dampen evenly if you use water popping, then give the fibres time to settle. Water popping (lightly wetting the wood after final sanding) helps even stain uptake on tight-grained species and produces deeper tones. Use it with care and test first.
Run a dehumidifier during cure if RH creeps up. If you see any milky blush under a waterborne finish, pause, add airflow, and let the coat clear before proceeding.
City picks
City floors need abrasion resistance above all. A well‑specified 2K waterborne with good abrasion and black‑heel‑mark resistance suits families, pets, and prams. For kitchens and hallways, keep sheen low to disguise micro‑scratches from daily grit. If you want a natural look with hardwax oil, build a maintenance plan into your calendar and stock the correct cleaner. Avoid silicone polishes that contaminate the surface and can block future recoats.
Another city decision is recoatable systems. Choose products designed for screen‑and‑recoat without stripping. That single choice can delay a full sand by many years in busy homes. If chairs always live in one area, add felt pads and rotate rugs seasonally so wear evens out.
Sports/community halls & heavy use
Safety and scheduling matter in shared spaces. Floors should maintain adequate grip for the activity. The pendulum test is widely used to measure slip resistance; aim for a Pendulum Test Value (PTV) of 36+ in shod areas unless your risk assessment requires more.
Plan annual screen‑and‑recoats during holidays and full sands every 7–10 years, based on traffic and bookings. Encapsulate court lines between coats so markings remain crisp and protected. Keep a small budget each year for line touch‑ups and local repairs.
Underfloor Heating, Ventilation, and Damp‑proofing
Underfloor heating (UFH) rules
Underfloor heating feels great, but it can be tough on timber if not handled carefully. Most recommendations say your floor surface shouldn’t go above about 27 °C.
When sanding or applying a finish, heat the floor up and cool it down slowly. You can go with about 1 °C per day until you reach your usual setting, and the same when turning it down. Don’t give it sudden blasts of heat. If your thermostat has a floor sensor, use it – air temperature alone isn’t a good guide for what’s happening at the surface.
While your finish is curing, keep the temperature steady and the humidity in the right range. If the heat rises too quickly, solvents or water can evaporate too fast, leaving you with application problems.
Ventilation and humidity control
Airtight retrofits reduce heat loss, but it also changes how moisture builds up indoors. On the coast, fog can keep humidity high for days. In cities, everyday activities like cooking, showers, or even plastering work can quickly push humidity past safe levels for coatings.
During renovation, make sure there’s controlled ventilation. Run extractor fans, allow cross-flow air where it’s safe to do so, and use temporary dehumidifiers in damp-prone rooms. If you’re working on an older property, get conservation advice before blocking vents – heritage buildings often need a different approach.
The goal is balance, not sealing the house completely. Keep a hygrometer handy, and always check the reading before each coat.
Damp‑proofing & wind‑driven rain paths
Before any refinishing, look for obvious rain paths:
- Damaged door thresholds or missing sills.
- Clogged weep holes or air bricks.
- Failing sealant at frames and upstands.
Fix these first. A beautiful finish will fail early if water still reaches the edge grain. If you live in a high Driving Rain Index zone, consider drip details and improved flashing so wind‑blown rain sheds away from doors.
Floor Maintenance Tips: Coastal vs City Routines
The goal here is to increase the duration between floor sanding and refinishing operations. Remember, each wood floor can only be restored a limited number of times. So how do you prevent premature wear?
Coastal routine
Salt is one of your top threats. Keep it out and your finish lasts.
Adopt rinse‑friendly entry mats and wash them often. Dry mop with microfibre several times a week in high‑exposure rooms. Use a neutral pH cleaner that leaves no tacky residue. After a stormy week, dehumidify to bring RH back to your normal band. Watch the windward rooms and thresholds; they need more love.
Set a quarterly checkup: inspect for dull patches near doors, whitened film, or small water marks. Deal with these early. If you run a penetrating oil or hardwax oil, top up those spots on schedule. If you run a film finish, check whether a recoat is due rather than pushing to failure.
City routine
Your enemy is grit. Stop it early and you protect the film.
Use a two‑stage entry: scraper outside, absorbent mat inside. Fit felt pads under every chair and replace them as soon as they compress. Vacuum with a HEPA filter to remove fine dust instead of pushing it around.
Kitchen and dining areas benefit from more frequent cleaning. Oil aerosols bind dust into grime. A weekly damp mop with a neutral cleaner keeps film build‑up away. Consider small runners where kids drop schoolbags or where office chairs roll.
How often should you recoat?
A maintenance recoat is the cheapest way to keep floors looking sharp. It’s generally recommended that you do this every 3–5 years in lived‑in homes, sooner for busy corridors and commercial spaces. That cycle adds protection before the old film wears through to bare timber.
The benefits compound. Regular recoats postpone the day you must sand. They also keep colour and sheen consistent across rooms. Ask for products that are designed for screen‑and‑recoat so you can refresh without stripping back to wood.
When to Schedule Professional Floor Sanding
Clear “book‑it‑now” triggers
Book a professional assessment if you see any of the following:
- Grey traffic lanes where finish has worn to bare wood. When finish is gone, the timber oxidises and traps grime, turning the lane grey. Drip a teaspoon of water on the lane: if it soaks in quickly and darkens the wood, you’re past recoat territory. A full sand removes the discoloured fibres, evens the profile, and gives stain and sealer a clean, bondable surface.
- Deep scratches that catch a fingernail and break the film. Run the fingernail test: if your nail snags, the protective film is breached and dirt sits in a groove. Spot fixes can work for one or two boards; when the damage is widespread, sanding the whole area restores flatness and stops the marks telegraphing through a new coat.
- Persistent cupping or crowning after you have addressed moisture. Cupping means edges are high; crowning means the centre is high. If boards stay deformed after RH has sat steady for 2–3 weeks, the shape is locked in. Check with a moisture meter at edges and centre; if readings are even and the shape remains, sanding flat is the only lasting fix.
- Water stains that won’t blend with a recoat. Tannin/iron reactions in species like oak leave dark blotches that a simple screen‑and‑recoat won’t hide. You may reduce pale water marks with oxalic acid, but black stains usually need a full sand (and sometimes board replacement) before you re‑finish to an even colour.
- A planned colour change that requires full resanding. Going from dark to light, or from oil/wax to a clear waterborne, means removing the old colour and any contaminated layers. Full sanding lets you set the final grit for the stain you want, run sample boards, and build a finish system that’s actually compatible.
If moisture is the cause, sanding won’t cure it. Treat the water path first. The moisture thresholds for timber and screeds that we talked about above—≤65% RH for timber—should guide the timing.
Best time of year
Late spring to early summer offers steadier RH and fewer storms. That stability helps coats cure well and reduces post‑sanding movement. Autumn and winter can work too, but you’ll need dehumidifiers and stricter RH control. Check weather reports and storm updates to avoid a messy week.
Can your floor be sanded?
Not all floors have enough wood left. As a rule, if the remaining wear layer is under about 3/32″ (~2.4 mm), don’t sand. You risk exposing the tongue or core. When in doubt, request a professional measurement and lean toward a maintenance recoat instead of a full cut.
Getting Floor Sanding Quotes
Ask for like‑for‑like proposals. Specify:
- Grit sequence and dust extraction method.
- Finish system by performance type (e.g., 2K waterborne polyurethane) and number of coats.
- Cure and re‑entry times.
- Recoat compatibility and a simple maintenance plan.
Multi‑unit homes like apartment blocks add logistics. Confirm working hours, lift protection, and quiet equipment. Waterborne finishes help with odour and reoccupancy. Plan a clear route for the sanding kit and extraction hoses so common areas stay clean. For such cases you will also want to have short work windows. Screen-and-recoat can often be completed in a day with overnight cure for light foot traffic, depending on product.
Time the floor sanding for a stable RH window and commit to regular recoats. With that routine, you get fewer surprises, longer life, and floors that look good for years.
Want a tailored plan? Share your room sizes, floor type, and a fortnight of RH logs. You’ll get a schedule, finish spec, and a maintenance checklist that fits your home.