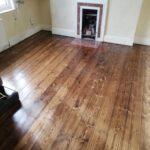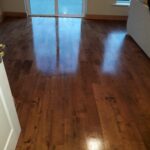
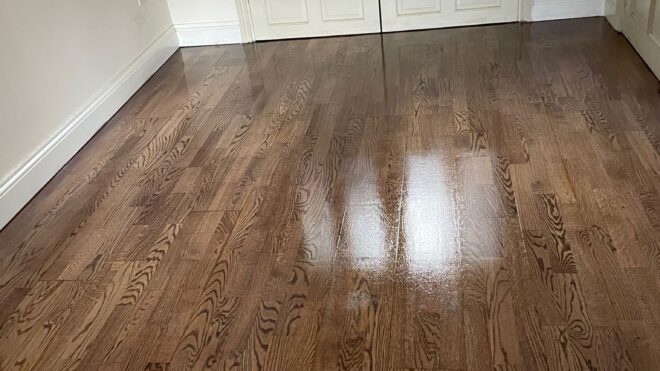
Even the toughest floors will start to show a bit of wear and tear with time. How do you know when it’s time to have them restored?
-
Visible Scratches and Gouges
Wooden floors go through a lot. Everyday wear and tear leaves its mark. Fulling that dinner chair. Pets with sharp claws running around the house. Kids with their toys and train tracks set up on the floor. Even walking in with gritty shoes can slowly ruin the surface.
Run your hand over the floor. Feel any rough patches? That’s a red flag. Look for areas where the finish has worn away. If you can see white lines, that’s the raw wood peeking through. Deeper gouges will be even more obvious—you might even feel them underfoot. And don’t forget the edges. These often get missed during cleaning but take just as much wear and tear.
Light scratches can sometimes be buffed out with a good polish. For widespread damage, sanding is the only solution. If in doubt, you can call in a floor sanding Dublin professional. They can assess whether your floor needs a light sand or a full-on restoration.
-
Dull and Faded Appearance
Wood is a natural material, and it changes with its surroundings. Sunlight, heavy foot traffic, and harsh cleaning products all wear down the finish. The more exposure, the duller your floor looks.
Your floor shouldn’t look tired and lifeless. It affects the ambience of the rest of the space. After all, the floor is the largest structure on the premises. If it looks forlorn, it reflects negatively on everything else. That’s not the kind of environment you want to live in or host guests in.
Got big windows or glass doors? Your floor’s probably feeling the effects of direct sunlight. UV rays break down the finish, making the wood lose its vibrant colour. That warm oak you loved might now look pale and washed out.
You might notice some areas are lighter or darker than others—that’s uneven fading. Furniture and rugs block the sun, creating noticeable patches when they’re moved. It’s like your floor has a permanent tan line.
Every step you take creates tiny bits of friction between your shoes and the floor. The busier the area—like hallways or living rooms—the quicker the shine disappears. You’ll spot dull patches popping up before you know it. And don’t be fooled—it’s not just clunky boots doing the damage. Even soft slippers and ordinary shoes contribute to the gradual breakdown
Once the finish starts to wear off, the wood underneath becomes vulnerable. Without that protective layer, scratches and stains can easily settle in. Dirt and grit from outside can act like sandpaper, speeding up the process. Even vacuuming too often with a hard-bristle brush can contribute to the wear.
Cleaning chemicals can make it worse. Using harsh or inappropriate cleaners gradually strips the protective layer from your floor. This leaves the wood vulnerable to further fading. If you’re using anything other than a gentle, wood-specific cleaner, you could be doing more harm than good.
Does the floors look dull no matter how much you clean it — especially in natural light? Are there areas where the wood looks faded or uneven? If yes, it’s time to sand. A quick water test can help. Drip a few drops of water onto the surface. If it beads up, your finish is still intact. If it soaks in, the finish is worn out, and sanding is needed.
-
Water Damage and Stains
Water and wood don’t mix well. A spilled glass of wine, an unnoticed plant pot leak, or even a burst pipe can lead to water soaking into your floorboards. And it doesn’t take much. Even a small amount of water left too long can cause trouble. Rainy boots being dragged through the house or high humidity levels aggravate the situation.
Keep an eye out for dark spots or patches—those are water stains. If the edges of the boards are curling up (cupping) or the centre is puffing up (crowning), moisture is the culprit. Notice a musty smell? That’s trapped moisture too, and if you ignore it, mould won’t be far behind.
Moisture doesn’t just make your floor look bad; it messes with the wood’s strength. Boards can go soft, warp, or worse—start to rot. And once rot moves in, you’re not sanding your way out of it. You’ll need to replace the boards entirely.
Sanding can remove surface stains and smooth out minor warping. But it’s important to address the source of the moisture first. Otherwise, you’ll be right back where you started. For deep stains or severe warping, professional floor sanding Dublin services will be necessary. They’ll know how much of the wood to remove without compromising its strength.
-
Splinters and Rough Patches
Bare feet and splinters don’t mix. You might be walking across your living room only to feel that sharp sting in your heel. Or worse, your child might crawl across the floor and end up with a nasty splinter in their hand.
What causes splinters and rough patches? Wood expands and contracts with humidity and temperature shifts. This constant movement can cause the wood to splinter or lift slightly from the surface, creating rough spots.
Dragging heavy furniture across your floor without protective pads can scrape the surface, leaving rough patches behind. High-traffic areas, like hallways and kitchens, wear down faster, leading to uneven surfaces.
Sanding gets rid of splinters and also creates a more even, comfortable surface to walk on. No more worrying about sharp surprises when you’re barefoot.
-
Noticeable High and Low Spots
Improper installation is often to blame here. If the subfloor wasn’t level when the wood was laid, it can cause the boards to shift. Subfloor settling is another common cause, especially in older homes. Here the floors become uneven due to the house shifting and settling. ]
Walk across the room and pay attention to how it feels underfoot. Do you notice sudden dips or bumps? You might even hear a hollow sound when stepping on certain areas—that’s a sign the boards aren’t sitting flush with the subfloor.
You can also use a straightedge or level. Place it on different parts of the floor to see if it rocks or if there are gaps underneath.
Sanding can level out these high and low spots, creating a smooth, even surface. However, a professional needs to assess the particular situation to determine if the installation itself needs to be redone.
-
Gaps Between Floorboards
Wood is a natural material that expands and contracts with changes in moisture levels. During dry seasons, like winter, the boards shrink, creating noticeable gaps. When humidity returns in the summer, the boards might swell back, but repeated cycles of shrinking and expanding cause the gaps to become more permanent.
As floors get older, the wood fibres also lose their natural elasticity. Years of wear and tear, combined with environmental changes, cause the boards to separate. This is especially common in older homes where the original floors have been around for decades.
Besides being an eyesore, gaps can lead to debris accumulation. Dirt, dust, and crumbs fall into the spaces, making your floor harder to clean. You might even find yourself constantly sweeping, but those pesky gaps will always trap something.
Even worse, gaps can invite pests. The likes of ants and spiders starting making their homes in these spaces. That’s unnerving. You definitely don’t want an ecosystem of critters populating your home.
The gaps also affect insulation. In winter, you might feel a draft coming from the floor. That’s cold air sneaking in through those gaps, making your home less energy-efficient and increasing heating costs. This can lead to a chilly, uncomfortable living space.
Can floor sanding fix gaps? Yes, but not alone. It’s combined with filling techniques. Filler agents that are compatible with the wood boards are used and mixed with sanding dust. That way, they end up having similar properties to the rest of the floor.
Resin-based fillers mixed with sawdust are great for matching the exact colour of your floor, making them ideal for narrow gaps under 5mm. For older floors that shift with the seasons, flexible gap fillers are a smart choice as they expand and contract with the wood, keeping everything looking smooth year-round.
For larger gaps, slivers of wood might be inserted before sanding. This method restores the floor’s integrity and prevents future gaps from forming.
-
Persistent Floorboard Creaking
Floors creak for a few simple reasons, and one of the most common is loose nails or screws. The fasteners holding your floorboards can wiggle loose. When the boards shift against these or rub against each other, you get that familiar creaking sound. This happens a lot in older homes where nails were used instead of modern screws.
Another cause is the subfloor—the layer beneath your floorboards. If it’s shifted, settled, or wasn’t installed properly, gaps can form between the boards and subfloor. When you step on those spots, the boards flex and creak. It might seem like a small issue, but it can weaken the overall structure of your floor.
Humidity and seasonal changes don’t help either. Wood swells in humid summers and shrinks in dry winters. This back-and-forth movement loosens boards. In places like Dublin, where the weather frequently changes, your floors go through this cycle constantly, wearing them out even faster.
So, why is persistent creaking a big deal? It’s not just an annoying noise—it could mean there’s a deeper problem. Creaks might be the first sign of loose boards or even cracks forming in the wood. If you ignore it, the damage can spread, affecting the stability of your entire floor.
Creaking also means friction. Every time you hear that noise, parts of your floor are rubbing together. More friction means more deterioration. When you hire a professional to sand your floor, they’ll first check for loose boards and fasteners.
Sanding smooths the surface, reducing friction between boards. If some boards have warped or expanded, they can be leveled out. It’s best to leave this to the pros. Taking it on as a DIY project can lead to more harm than good.
-
Peeling or Chipping Finish
The cause is usually water, especially when it disrupts the bond between the wood floor and its protective finish. This can lead to the finish bubbling, peeling, or chipping away.
Heavy foot traffic also contributes to this. Areas like hallways, kitchens, and entryways endure constant wear and tear. The more people walk over these spots, the faster the finish wears down. Shoes, especially high heels or those with hard soles, act like sandpaper on the surface, causing the finish to crack and peel.
Sunlight exposure can’t be ignored either as it breaks down the protective finish. This leads to fading, peeling, and chipping, especially in rooms with large windows or glass doors. You might notice that areas near windows look dull and flaky compared to spots hidden under rugs or furniture.
Why is a peeling finish a problem? A chipped or peeling finish exposes your wood to further damage. Without that protective layer, your floor becomes vulnerable to moisture, dirt, and scratches eventually leading to warping, stains, and even rot.
It also affects the feel of your floor. Peeling finishes create rough patches that are uncomfortable to walk on, especially if you like going barefoot at home. In some cases, the chipped edges can even become sharp, posing a risk of cuts or splinters.
-
Difficulty in Cleaning
Do you find yourself spending loads of time cleaning the floors, yet they remain dull? Or scrubbing away at stains for hours yet they don’t seem to budge?
The protective finish has likely been worn down due to constant foot traffic, cleaning products, and daily use. Once it’s gone, the bare wood is exposed, and dirt sinks deep into the grain. No matter how often you mop or scrub, the floor still looks dull because the problem isn’t just on the surface—it’s inside the wood.
Stubborn stains make things worse. Spills and moisture seep into unprotected wood, leaving marks that won’t budge with normal cleaning. Coffee, wine, and even water can leave permanent stains once the finish is gone. These marks aren’t just on the surface—they become part of the wood, leaving your floor looking dirty no matter what you do.
Sanding removes the top layer of wood, taking those deep stains and deteriorated finish with it. A fresh new one can then be applied,, restoring the floor’s original shine.
-
Bubbling or Blistering Finish
Noticing bubbles on your floor? That’s usually a sign of trapped moisture. When water sneaks under the finish, it breaks the bond between the protective layer and the wood. This causes the finish to lift, creating bubbles or blisters on the surface.
This can be due to poor sealing, or using the wrong cleaning processes. Your floor’s finish is its first defence against damage. When it starts bubbling, it’s no longer doing its job. Dirt, dust, and even more moisture can get in, speeding up the damage. Worse still, mould and mildew can start growing under the finish.
Sanding is the best way to tackle this. But before you refinish, you need to sort out the moisture issue.
How to Choose a Floor Sanding And Refinishing Service
Once time comes to for the food to be restored, you want to have this in the hands of a professional.
-
Experience Matters
Check how long the company’s been around. A business with years under its belt will know the ins and outs of different wood types, finishes, and those surprise issues that can pop up. Newer companies might offer lower prices, but do you really want your floors to be their learning curve?
Ask how many jobs they’ve completed. A seasoned company should have plenty—hundreds, maybe even thousands. Look for specialists, not jacks-of-all-trades. A team that focuses solely on floor restoration is more likely to deliver quality results than one juggling all sorts of home improvement tasks.
-
Read Reviews and Ask for References
Word travels fast, especially online. Check out reviews on Google, Trustpilot, or any local business listings. Spot a pattern? If lots of people mention poor communication or sloppy work, that’s your cue to steer clear. But if reviews rave about professionalism, punctuality, and great results, you can be more confident in their services.
Ask for references as well. A trustworthy company will happily share details of past clients. Give them a ring. Were they satisfied with the work? Did the job finish on time? And most importantly—did the team tidy up afterwards?
-
Get a Detailed Quote—Not Just a Number
A professional company will provide a clear, detailed quote. It should break down the cost of labour, materials, and any additional services. Be wary of vague quotes—they often lead to surprise charges later on.
Ask if the quote includes:
- Preparation work (like moving furniture)
- Dust containment
- Finishing and sealing
- Cleanup after the job
Compare quotes from different companies, but don’t just go for the cheapest option. Remember, you get what you pay for.
-
Are They Insured and Licensed?
This one’s non-negotiable. Accidents can happen at any time, and you don’t want to be exposed to liabilities. Work with a company that has sufficient coverage. Liability insurance protects your home, and worker’s compensation covers the team working on your floors.
Ask for proof of insurance and licensing before signing any contracts. If they hesitate or give excuses, move on.
-
Timeline and Flexibility
A typical floor sanding project can take anywhere from 2 to 5 days. This will come down to how large the area is and the condition of the floor. Make sure the company gives you a realistic timeline—not just what you want to hear.
Also, check if they’re flexible with scheduling. Life gets busy, and you want a company that can work around your availability, not the other way around.
-
Guarantees and Warranties
Does the company offer any guarantees or warranties? A confident, professional service will stand behind their work. This could be a guarantee on the finish or a warranty covering any issues that arise within a certain period.
Make sure you get this in writing. Verbal promises don’t hold much weight if something goes wrong later.
Also pay attention to how they communicate, from the first call or email. Are they prompt in responding? Do they answer your questions clearly? A company that values good communication is more likely to be professional throughout the project.
Frequency of Floor Sanding
How often you should sand your floors depends on issues like the type of wood to how much traffic your floor sees.
General Guidelines:
-
Every 7-10 Years:
For most homes, sanding every 7 to 10 years keeps floors looking fresh.
-
High-Traffic Areas:
Hallways, kitchens, and entryways may need sanding more often, around every 5 years.
-
Lightly Used Rooms:
Bedrooms or formal living rooms might go 10-15 years without needing sanding.
Factors That Affect Frequency:
-
Wood Type:
Hardwoods like oak and maple withstand wear better than softer woods like pine. Softer woods may need more frequent sanding.
-
Finish Quality:
A high-quality finish protects your floor longer. Floors with oil-based finishes tend to last longer between sanding than water-based finishes.
-
Household Lifestyle:
Pets, kids, and heavy furniture mean more wear and tear. The more active your household, the sooner you’ll need sanding.
If your floor looks dull, scratched, or has visible damage, it’s time to sand—even if it’s been less than 7 years. Don’t wait for severe damage. Regular sanding extends your floor’s lifespan.
Worried about the mess? Dust-free floor sanding Dublin services are now available. The process uses high-powered vacuum systems attached directly to the sanding equipment. As the sander removes the top layer of your floor, the dust is sucked into the vacuum, leaving your home virtually dust-free.
Key Benefits:
-
Cleaner Process:
No more dust coating your furniture or settling in every nook and cranny.
-
Healthier Air Quality:
Dust-free sanding reduces airborne particles, which is especially important if you have allergies, asthma, or young children.
-
Better Finish:
Dust particles can settle back onto the floor during traditional sanding, affecting the final finish. Dust-free sanding results in a smoother, cleaner finish.
-
Faster Cleanup:
With minimal dust, there’s no need for extensive post-sanding cleaning. You can enjoy your newly finished floors right away.
Water vs Oil-Based Finishes
Once the floor is sanded, next will be the treatments. These are some of the main ones. Oil-based finishespenetrate deep into the wood and on average last about 10 years before needing a recoat.
Water-based finishes, while durable, usually need recoating every 5 to 7 years. Advances in technology have made high-quality water-based options nearly as tough as their oil-based counterparts. Some premium brands even rival the 10-year lifespan of oil-based finishes.
Appearance: Warm Glow or Natural Look?
Oil-based finishes give wood that rich, amber glow. They deepen over time, bringing out the grain and giving your floors a warm, classic look. Think of traditional hardwood floors in older homes—that’s the oil-based charm.
Water-based finishes, on the other hand, keep things light and natural. They dry clear, preserving the wood’s original color. If you’re into the Scandi aesthetic or want to keep maple, ash, or birch looking fresh, water-based is your go-to.
Drying Time
Oil-based finishes demand patience. They can take up to 24 hours to dry between coats and might need 3-4 coats. That’s several days out of your house or living with strong odors.
Water-based finishes dry in as little as 2-4 hours between coats. You can knock out a project in a day, especially if you’re applying just 2-3 coats. It’s perfect if you’re on a tight schedule or can’t bear to be without your space for too long.
Indoor Air Quality
Oil-based finishes have a strong smell and are packed with Volatile Organic Compounds (VOCs). That “new floor” scent might seem nice, but it’s not doing your lungs any favours. You’ll need good ventilation, and it’s best to keep kids and pets away until the floor’s fully cured.
On the other hand, water-based finishes are low in VOCs and only have a slight odour. They’re much kinder to your indoor air and a safer pick if you’re worried about health or the environment.
Maintenance
Oil-based floors are easier to spot repair. Got a scratch? A little sanding and a dab of finish can fix it. But when it’s time for a full refinish, it’s a bigger job—lots of sanding and waiting.
Water-based finishes are harder to spot repair. Blending patches can be tricky because they dry so clear. However, a full recoat is simpler. Since water-based finishes don’t amber, you don’t have to sand down to bare wood to match the old color.
Choosing between water-based and oil-based finishes comes down to what matters most to you. Do you prioritize durability and a warm look? Oil-based might be your best bet. Want a quicker, eco-friendly option with a natural finish? Water-based is the way to go.
Whatever you choose, make sure it fits your lifestyle, budget, and aesthetic.
Long-Term Floor Maintenance After Sanding And Refinishing
Once the restoration job is complete, you want to keep your floor looking elegant for as long as possible.
Daily Cleaning – The Right Way to Remove Dust
Sanding might be done, but dust lingers. Even after a deep clean, fine particles settle into corners and under furniture.
-
Vacuum every day for the first week.
Use a soft-bristle attachment to avoid scratching the surface.
-
Skip the standard broom.
It pushes dust around instead of picking it up.
-
Microfibre mops work best.
They trap dust without spreading it back into the air.
Mopping – Too Much Water is a Problem
A soaking-wet mop will ruin your floor. Water seeps into cracks, causing warping, swelling, and even discolouration. If you overdo it, your beautiful floor could start to lift or buckle.
- Use a barely damp mop – not soaking wet. A spray bottle with a light mist works even better.
- Avoid steam mops. Heat and moisture can break down the finish.
- Choose the right cleaner. Some products strip protective coatings without you realising.
A mix of warm water and mild pH-neutral soap is your safest option. Anything too harsh can eat away at the finish.
Dealing With Spills
Liquids need to be cleaned up immediately. Wood is porous. Even sealed floors absorb moisture if left too long.
- Blot spills instead of wiping. Rubbing spreads the liquid into the grain.
- Avoid abrasive cloths or scrubbers. They scratch the surface and leave dull spots.
- For sticky messes, use a damp cloth with a drop of dish soap.
A forgotten spill can lead to stains, warping, or even mould. Act fast to keep the floor in top condition.
Furniture and Floor Protection – Stop Scratches Before They Start
Furniture can leave deep dents. Chairs and tables scratch the surface every time they move.
-
Stick felt pads under all furniture legs.
They prevent direct contact between wood and hard surfaces.
-
Replace old pads every few months.
Dust and grit wear them down over time.
-
Avoid rolling chairs on wood floors.
If you have one, get a protective mat.
Rugs – When and Where to Use Them
Rugs protect high-traffic areas, but timing is everything.
- Wait at least two weeks before placing rugs on freshly finished floors. Some finishes need up to a month to cure fully.
- Use breathable rug pads. Plastic or rubber-backed mats can trap moisture and cause staining.
- Rotate rugs every few months. This prevents uneven fading from sunlight exposure.
The wrong rug can cause just as much damage as shoes or furniture.
Shoe Rules
Shoes carry dirt, grit, and moisture straight onto your floor. High heels and hard soles can leave dents. Trapped grit acts like sandpaper. Tiny particles scratch the surface with every step.
Encourage a no-shoes rule indoors. At the very least, keep mats at all entryways.
A well-maintained floor can last decades before needing major work. The better your upkeep, the longer you can go between refinishing jobs.