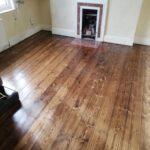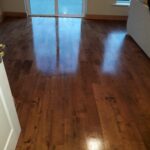
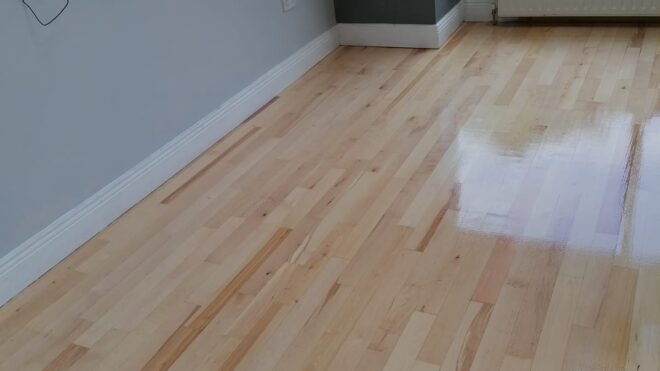
Can Your Floor Survive Another Sanding?
A tired wooden floor can make sanding feel like the obvious answer. The finish is scratched, the colour has gone patchy, there are grey traffic lanes through the hall and the boards have lost the warmth they had years ago. Strip it back, coat it again, problem solved.
Except floor sanding has one slightly inconvenient habit: every full sand removes some of the floor itself.
That matters far more on the second, third or goodness-knows-which sanding than it did on the first. A wooden floor may still look thick and substantial from above while the usable timber above its tongue and groove has become surprisingly thin. With engineered wood, the margin can be smaller again because only the top layer is the decorative hardwood you are trying to preserve.
So before deciding on what colour stain to choose or whether matt lacquer will hide the dog scratches, first consider how much wood is actually left.
Floor sanding has a limit
Wooden floors are renewable in a way many floor coverings are not. A worn surface can often be restored instead of ripped out. The sanding and refinishing is an appropriate option when there are deep scratches, dents, significant wear or exposed bare wood. However, it all depends on the remaining wear layer, the condition and flatness of the floor, the equipment used and the skill of the person doing the work.
Think of the wear layer as the floor’s sanding allowance. Once it is gone, it is gone. A floor sander is very good at removing damage. It is less talented at putting timber back.
On a conventional tongue-and-groove solid wood floor, the full board thickness is not the same thing as the sandable thickness. The useful wear layer sits above the tongue and groove. Sand too far and you get closer to fixings and weaken the wood above the groove. Old square-edged or face-nailed boards have a different construction, but they still have limits set by remaining thickness, fixings, previous wear, cracks and repairs.
Engineered wood ups the ante. It has real wood flooring, but the decorative top layer is bonded to a core beneath it. That top layer, often called the wear layer or lamella, is the part that can potentially be sanded. The core is not a bonus layer waiting for its turn.
Forget the ‘fixed’ number
Search online and you will find confident claims that a solid floor can be sanded a particular number of times and an engineered floor once or twice. Those numbers can be useful as broad comparisons, but they are a poor way to judge an existing floor in a real house.
Most solid wood floors may, in general, tolerate several refinishes over their service life, but immediately qualifies that estimate. The actual number is affected by wear-layer thickness, previous sanding, floor flatness, damage, equipment and technique. A wood floor being considered for another full sand should generally have at least about 3/32 inch, roughly 2.4 to 2.5 mm, of usable wear layer remaining. So it’s not just how many times you remember hiring a sanding company.
Even that measurement is not a universal guide. Deep bevels, a badly uneven floor, old drum-sander dips or damage that needs aggressive removal can consume more timber than a light, controlled refinish. A nominally thick floor can therefore be a worse candidate than a thinner but flat, well-maintained one.
Manufacturer information is useful for the same reason. For example, say you have an engineered oak floor, with a 3.5 mm wear layer and is listed as being resandable two to three times. That is a product-specific specification, not a rule that every 3.5 mm engineered floor in an Irish home gets two guaranteed future sandings. Construction, previous work and the condition in front of you still decide the outcome.
Solid wood can still run out
Solid timber has a deserved reputation for longevity. It gives you more material to work with than many engineered products and can often be restored repeatedly over decades. The danger is assuming ‘solid’ means ‘indestructible’.
An older floor may have already been levelled during installation, sanded during several renovations, attacked with a hire-shop drum sander in the 1990s and then sanded again when the house changed hands. The present owner may know about none of it. The boards do not arrive with a service history tucked underneath the skirting.
There are clues. Nail heads sitting unusually close to the surface deserve attention. So do splits that follow the line of a tongue or groove, thin or fragile board edges, previous sanding hollows and a floor that visibly changes level near walls or doorways. None of these proves on its own that the floor cannot be refinished, but together they can tell you that another aggressive sand is not a routine maintenance job.
This is particularly relevant with period floors. A perfectly flat, pale, newly milled look is not always the right objective for an old Irish floorboard. Sometimes the small undulations, old fixing marks and colour variation are part of the floor’s character rather than defects to grind away.
For protected structures and historically important interiors, that judgement becomes more than aesthetic. Ireland’s Architectural Heritage Protection Guidelines state that historic floor structures and finishes should be identified and respected, and that efforts should be made to retain flooring of interest. In that setting, preservation should lead the conversation.
Dealing with engineered floors
Engineered wood has more at stake. Looking at the face of a board often will not tell you how thick the hardwood layer is. Two floors can look almost identical from above and have very different prospects for another sand.
The first job is identification. If the original invoice, product name or installation paperwork still exists, start there. A spare board left in a utility room, attic or garage is even better because it shows the full cross-section without disturbing the fitted floor. Product data may give the total thickness, top-layer thickness, surface treatment and whether the manufacturer considers the floor resandable.
If there is no paperwork, a professional may inspect a side profile at a threshold, transition or another exposed edge. Measure at several locations because one convenient spot does not tell the whole of it. The thinnest or highest area can be the one that dictates what is safe.
Bevels complicate matters. A micro-bevel may partly or completely disappear during a full sand. Deeper bevels can require more material removal if the aim is a flat surface. Brushed, hand-scraped and other textured floors are trickier again because the lowest parts of the texture already sit closer to the core.
A total renovation back to bare wood can radically change stained, bevelled or brushed surfaces, and some thin engineered products cannot be sanded at all. Restoring the timber may also erase some of the factory-made appearance you originally bought.
Previous sanding changes the calculation
A good sanding job removes only what needs to be removed. A bad one leaves a bill for the next person.
Deep drum marks, gouges, hollowed areas at the perimeter and a floor that was aggressively flattened in the past all reduce the remaining margin. The problem is not just that timber has already disappeared. To correct those defects now, the next contractor may need to sand surrounding areas down to the level of the deepest mistake.
Floor flatness matters for the same reason. Imagine one board or one part of the room sitting slightly proud. The sanding machine meets that high spot first and removes more from it while trying to bring the surface into a workable plane. If the wear layer is already marginal, a few local high points can turn a theoretically sandable floor into a risky one.
This is why measuring only one board at one doorway can create false confidence. The assessment has to match the floor as it exists, not the thickness it had on the manufacturer’s brochure fifteen years ago.
Six checks before another floor sanding
Before committing to full floor sanding, work through the questions that actually determine whether the floor has enough life left in it.
- What floor is it? Confirm whether you have solid wood, engineered wood, parquet or something that only looks like wood. Laminate and vinyl should not be treated as sandable timber.
- How thick is the usable layer now? Look for reliable product information or an accessible cross-section. With engineered flooring, total board thickness is far less useful than the actual hardwood wear layer.
- Is that thickness consistent? Check more than one location. Previous sanding, wear and unevenness can leave very different amounts of usable timber around the room.
- What must the sanding remove? A tired clear finish needs less intervention than deep dents, old dark stain, cupping damage or bevels that someone wants completely flattened.
- Is the floor stable and dry? Loose boards, movement, active moisture problems or a damaged subfloor need attention before cosmetic refinishing.
- Does it need a full sand at all? If the timber is sound and the problem is mainly a worn surface coating, a compatible maintenance recoat may preserve far more of the floor for the future.
Do not turn the wear-layer check into an enthusiastic DIY archaeology exercise. Lifting boards or drilling exploratory holes can damage the floor and, in older properties, risks meeting pipes, cables or historic details you did not know were there. If a side profile is not already safely accessible, the inspection is a job for someone who knows how to expose or measure it with minimal disturbance.
Sometimes the floor needs less, not more
Full sanding is not the only way to refresh wood. You can go with a maintenance coat before having to do a full resand. A maintenance coat cleans and prepares the existing finish, lightly abrades it and adds a new coat. It does not take the floor all the way back to raw timber.
That can be a much smarter option when the finish has become dull or lightly scratched but the wood below is still in good condition. It keeps more of the wear layer in reserve and avoids turning a cosmetic problem into a structural calculation.
A recoat is not a universal shortcut. The existing coating has to be suitable and properly prepared, contamination can affect adhesion, and scratches that have cut through to bare or damaged wood may remain visible. There are also floors where colour change, heavy wear or widespread damage genuinely does justify a full resand.
The point is to diagnose before choosing the loudest machine in the room.
Water damage is a hard stop
Cupped boards are tempting. The edges have risen, the floor feels uneven and sanding looks like the quickest route back to flat. It can also be exactly the wrong moment to sand.
Do not sand a cupped floor until the moisture problem has been corrected and the moisture content of the flooring and subfloor has stabilised. Sanding too early can remove the raised edges while the timber is still distorted. If the boards later dry and change shape, the floor can end up with the opposite profile.
The same restraint applies to stains and deep damage. Trying to chase a black mark or gouge until it disappears may remove far more wood than the rest of the floor needs. In some cases, a local board repair or replacement preserves more original flooring than grinding the entire room down to the depth of its worst blemish.
Colour changes can be surprisingly expensive
One of the joys of floor sanding is that it can completely change the look of a room. Old amber varnish can come off. A dark floor can potentially become lighter. A new stain can take the timber somewhere else entirely.
But colour ambitions affect material removal. A clear finish that comes away cleanly is one thing. Dark pigment sitting in open grain, an old white treatment, heavy factory finish or a floor with bevels that must disappear can require a different sanding strategy. More aggressive work consumes more of the surface you are trying to save.
On a thick solid floor, there may be enough timber to make that trade comfortably. On an engineered floor with one viable resand left, using it purely to chase a fashion change deserves a harder think. You are spending part of the floor’s future service life for today’s colour preference. So be careful with what you’re deciding.
What happens when sanding goes through
With engineered flooring, sanding through the hardwood wear layer exposes the core beneath. The change is normally obvious because the material, grain and colour are different. There is no clever finishing product that turns the exposed core back into the original oak, walnut or ash veneer.
There are veneer sand-through failures where repair can become difficult because replacement boards may then need to be sanded to match the surrounding surface, risking the same problem again. Depending on the floor and extent of damage, local replacement or much larger replacement work may be required.
Solid flooring fails differently. As the surface approaches the tongue, groove or fixings, you may see fasteners, fragile edges or cracking along the joint. At that point, another sand is no longer simply a finishing decision. The floor’s construction is becoming part of the problem.
This is one mistake worth preventing. The sander has no reverse gear.
Save the next sanding for later
If the floor comes through its assessment with a healthy wear layer, the best sanding job is not the one that removes the most dramatic pile of dust. It is the one that achieves the required finish while preserving as much sound wood as reasonably possible.
After that, maintenance determines how soon you face the same decision again. Keep grit and dirt off the surface, deal with spills quickly, use protection under furniture and clean with products suited to the finish. Avoid treating a timber floor like a tiled bathroom floor. Excess water and steam are not badges of cleaning enthusiasm.
We encourage recoating when the surface becomes dull rather than automatically waiting until damage has progressed to the point where bare wood is exposed. Catching wear earlier can extend the interval before another full sand becomes necessary.
For an engineered floor, keep the original product details if you have them. For any floor, keep a record of what was done during the latest renovation, including whether it was fully sanded, how extensive repairs were and what finish was applied.
Always start with the timber
A wooden floor that looks rough may have decades of useful life left. Another one can look perfectly respectable and be one careless sanding pass away from trouble. Appearance alone does not tell you which one you have.
Before another floor sanding, identify the construction, establish the remaining wear layer, look for evidence of previous work, assess flatness and damage, and decide how much material the desired result would actually require. On engineered floors, check the product specification where possible. On old or historically important floors, remember that preserving original material can matter more than removing every scar.