Restoring Parquet Flooring
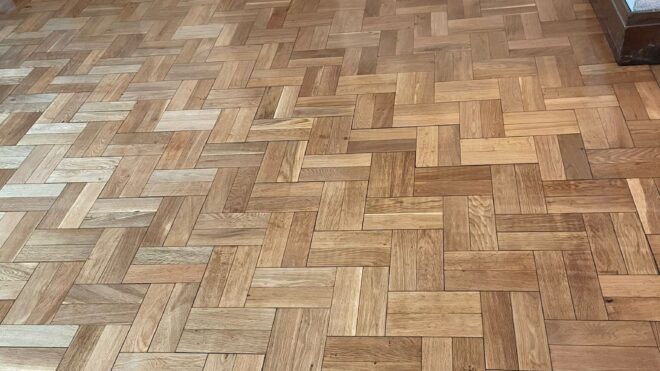
With parquet floors, the small slats of wood are arranged in repeating patterns – and traditionally this was done one piece at a time. Modern parquet flooring is usually in tile form where the wood slats are affixed to a backing material, and the installation is then done by having the tiles glued, stapled or nailed into the subfloor. The flexibility of the patterns means that this kind of floor can be made to match any particular lifestyle preference, arranging the slats of wood to form the design that appeals to you and brings the room together. Since the core is still wood, the parquet floor retains the looks and performance of conventional solid wood floors. Just like the latter, parquet surfaces need to be finished with protective treatments since they are prone to staining and water damage. However, even with the strongest finishes available, there will come a time when the effects of wear will be so pronounced, that a round of floor sanding and restoration is needed.
Getting To The Bare Wood
The purpose of the floor sanding is to remove the old treatment coats that are on the floor surface, getting to the wood itself. During this task, issues like scratches can also be resolved, and gaps in the floor filled. The sander is integral to this – and there are different kinds of equipment depending on the size of the area you’re working on, the skill and manpower needed to manoeuvre the sanders, all through to aspects like dustless floor sanding systems in order to limit the mess that would be made. Edger sanders and corner sanders come in handy for the tricky spots, and the equipment that is hired usually has different grades of sanding levels.
Note that taking on the task as DIY can be very laborious. Handling the equipment properly is just one aspect to worry about. Sanders are powerful machinery, and a mistake in the process can easily result in the floor getting damaged, or getting injured yourself – which is why it is recommended that you hire a professional for the floor sanding task. There are also risks to the sanding equipment. For instance, when working with an edge sander and the laminate layer is too thick, it will damage the sander – then you end up being forced to contend with expensive repair costs.
When sanding, the resultant surface should be smooth. The belt sander is manoeuvred over the surface, removing the existing finishes and lightly sanding through the worn layer of the wood. This is another area where care needs to be taken. If you sand too much into the parquet floor, you will weaken the structure, reducing its lifespan and necessitating it to be replaced much earlier than had been anticipated.
A couple of things should be noted:
- The floor is sanded in straight lines, just like regular floorboards. This is to avoid sanding some sections of the floor too heavily compared to others, in order to achieve a smooth result. Going cross-grain can also create gouges in the floor, and even tear the sanding belt.
- The floor is worked on at a consistent 45-degree angle. This is typically the direction of a set of blocks, since it is 45 degrees to the room.
- For the sanding sequence, one starts at the highest grit level and slowly works down.
The condition of the floor affects the methods used for the parquet floor sanding. For instance, the older floors, or those that are more damaged and have gaps between the floor boards, this will require filling processes to be included in the task. If the gaps are not properly filled, you will end up having an uneven finish at the end of the restoration process.
Extras Step: Buffing
Unlike other wood surfaces, you can’t just go straight from the parquet floor sanding to the finishing. Buffing is needed to get rid of the lines left behind by the sanding equipment. So more machinery is needed for the budding and polishing, as well as the different grades of buffing paper.
- For parquet floors that are made from the likes of teak, walnut, mahogany and other hardwoods that are naturally oily, you may need to scrub them with methylated spirit after the sanding process, and before you apply the finish coats. This is needed to remove the natural oils that will be on the freshly sanded surface, since it will interfere with the adhesion processes of the finish that will be applied.
Applying The Wood Finish
Now for the treatment that will be applied. The choice of product here will depend on your aesthetic needs, as well as the kind of protection needed, weighing in aspects such as the levels of traffic handled in the premises.
Definitely any dust that is on the surface will need to be cleared. You don’t want a case of dust getting trapped under the wet coats of finished products, since these will ruin the quality of the final result. When applying the lacquers and other treatments that will be spread onto the floor, also follow the 45-degree approach, in order to avoid a case of demarcation lines being formed.
Turn To The Professionals For your Parquet Floor Sanding
While a DIY process may be tempting ‘to save on costs’, it turns out that things can easily spiral out of control, and you even end up spending more time and resources to get the job done. From the preparations, the kinds of equipment that are needed, dealing with the sanding dust, the risks involved, and the measures that are needed to rectify damages from any mistakes that are made – this greatly reduces the feasibility of the DIY approach. On the other hand, getting a professional contractor to carry out the parquet floor sanding sees it get done in a fraction of the time that would have been taken for a DIY job. This also ensures that the resultant surface will be ready for the treatments that are to be applied.