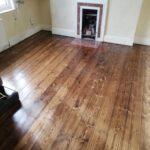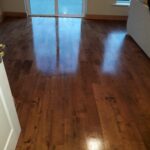
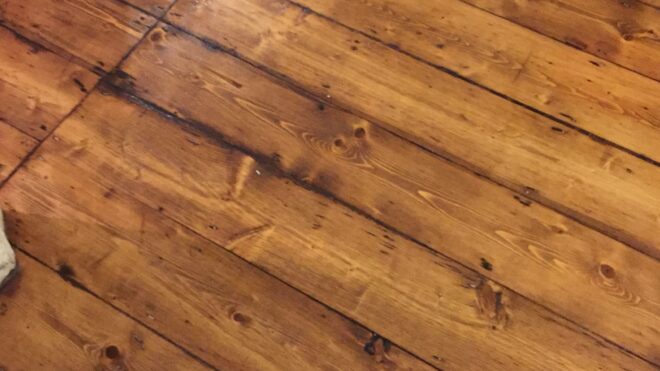
Floor Sanding vs. Floor Replacement
Floors take a daily beating. Just think of all the spills that land on them. Some tea here, wine there, water from flooding incidents, those cases where the pet has a urine accident in the house—and that’s just the liquid messes. Add wear from foot traffic, dirt and grit particles that are grinded against the surface, the sun’s rays beating down on the floor through the open windows—it all takes a toll. Sure, the protective finish keeps the effects at bay, but it doesn’t last forever. At some point, you will either have to sand and refinish the installation or rip it out and start fresh.
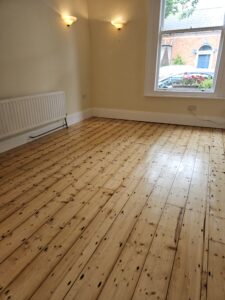
How Floor Sanding Works
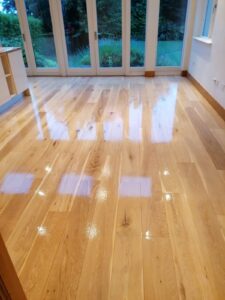
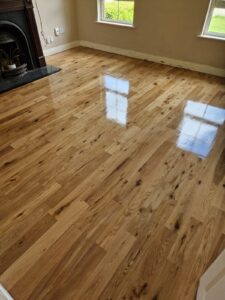
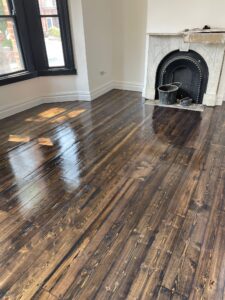
With this approach, you want to retain the current floor but change its top layers. Here, a powerful sander is used to grind away those top sections—which also include the old finish coats that have become worn out. This is done until the bare wood is exposed. The goal is to have a fresh surface for a new coat to be applied, and for the finish to be durable, this needs to be bonded strongly with the wood.
However, there’s one big issue with traditional floor sanding—the dust. It gets everywhere. On your furniture, in your curtains, even in your lungs. It’s hard to clean up, and worse, it’s not great for your health. That’s where dust-free floor sanding comes in. Here, powerful dust extraction systems are attached to the sander. They pick up the particles immediately as they are created—before they get a chance to escape back into the air. With HEPA vacuums integrated, the process can remove 99% of dust.
How Floor Replacement Works
The old hardwood gets pulled up. If there’s damage underneath, the subfloor might need repairs or even full replacement. It’s a good option if you’re dealing with serious issues—warped boards, water damage, or pest problems. These are things sanding can’t fix.
Once the old floor is out, it’s time to lay down the new one. But there’s no one-size-fits-all here. Different homes call for different materials:
-
Solid Hardwood Flooring:
The classic choice. Such floros last for long, though it also depends on the exact type of wood involved, with options like oak, maple, or walnut. However, they are more pricey
-
Engineered Wood Flooring:
Cheaper than solid hardwood but looks just as good. It’s made of a thin layer of real wood on top of plywood, which makes it more stable in humid rooms like kitchens.
Floor Sanding Costs
Here is a breakdown of expenses during floor sanding:
-
Labour Costs
-
Sanding Only:
Prices start from approximately €15 per square metre.
-
Sanding and Varnishing (3 Coats):
For semi-solid floors, expect around €25 per square metre; hardwood floors are about €30 per square metre.
-
Materials and Equipment:
-
DIY Approach:
Renting sanding equipment can cost between €50-€70 per day. Additional materials like sandpaper, sealants, and protective gear might bring the total to €150-€300 for a medium-sized room. However, DIY sanding can be challenging, and mistakes may lead to higher expenses in the long run.
Floors in good condition require less preparation, reducing costs. Conversely, damaged or uneven floors may need extra work, increasing expenses. Larger areas naturally incur higher costs due to increased labour and materials. Some contractors might offer discounts for extensive spaces, so it’s worth inquiring.
In urban areas like Dublin, prices can be higher due to increased demand and living costs. In contrast, rural areas might offer more competitive rates.
Cost of Floor Replacement
The type of flooring you select significantly impacts the overall cost. If the subfloor is uneven or damaged, additional preparation work will be necessary, increasing both labour and material costs.Services such as the removal and disposal of old flooring can add to the overall cost.
-
Removal of Old Flooring:
Removing existing flooring can cost between €15 to €40 per square metre, depending on the type of flooring and the complexity of the removal process.
-
Cost of New Materials (per square metre):
-
Solid Wood Flooring:
Prices range from €69.95 to €99.95
-
Engineered Wood Flooring:
Typically start from €30.
-
Parquet Flooring:
For a more intricate design, from €35 to €65.
Installation labours typically ranges between €30 to €40 per square metre for both solid and engineered wood flooring, adding to the overall cost. Parquate flooring is more expensive, at €35 to €65 per square metre due to its complexity in design.
Longevity and Durability
How Long Do You Have After Sanding?
A properly sanded and refinished hardwood floor can last anywhere from 7 to 10 years before it needs another round of sanding.
How often this happens comes down to factors like the type of wood. For the likes of oak and maple, you can do this at least 5 times before they become too thin. On the other hand, engineered wood has a thinner top layer, which means it can only be sanded once or twice at most.
How busy the premises get also weighs in. You’ll notice high-traffic areas like hallways and living rooms will see more wear compared to guest bedrooms, which are barely used. If there are pets or kids in the household, there will be more cases where sanding and refinishing are needed.
If the restoration is done by a professional floor sanding Dublin company, the quality will give you more life with the installation. Cheap varnish or poor workmanship throws you back to square one in no time.
How Long Will Your New Floors Last?
Wood’s a tough cookie. Hardwood floors like oak, maple, and walnut can keep their cool for 40 to 50 years. They’re built to last, but don’t expect them to stay flawless forever. After about 10 years, you’ll probably need to sand and refinish to keep them looking sharp. Life happens—scratches from furniture, pet paws, or those killer high heels will leave their mark. And if your home’s a busy one, or you’ve got a commercial space, you’ll be on sanding duty more often.
While engineered wood looks the part, it doesn’t quite have the same staying power. You’ll get a solid 20 to 30 years out of it. The top layer of real wood is thinner though, so you can’t sand it down too many times.
Maintenance Practices to Make New Floors Last Longer
The right care can add years to your floor’s life.
-
Clean Regularly:
Dust and dirt scratch and dull the surface over time. Use a soft broom, a vacuum with a hard floor setting, or a damp mop (depending on the material).
-
Protect High-Traffic Areas:
Use rugs and runners in hallways and entryways. This reduces wear and tear in the spots that get the most foot traffic.
-
Mind the Furniture:
Stick felt pads under furniture legs to avoid scratches. And when you move heavy items, lift them instead of dragging them.
-
Control Moisture:
Wood, laminate, and even some vinyl floors don’t like water. Wipe up spills immediately and use dehumidifiers in damp areas to prevent warping.
-
Watch the Sun:
Direct sunlight can fade wood floors. Use curtains or blinds during peak hours to keep your floors looking fresh.
-
Refinish When Needed:
Refinishing every few years protects against stains and moisture. Don’t wait until the floor looks worn—stay ahead of the damage.
Environmental Impact
When it comes to sustainability, floor sanding takes the crown. Why? Because it makes the most of what you’ve already got. Instead of tearing up your old floors and sending them off to landfill, sanding gives them a fresh start—maybe even a second or third lease on life. No need for new materials, and way less waste.
Refinishing your wood floors can save up to 90% of the materials you’d burn through with a full replacement. That’s fewer trees getting the chop, less energy guzzled in factories, and fewer carbon emissions from hauling new planks around.
Moreover, when replacing the floors, those new materials don’t just appear out of thin air. They need to be made, shipped, and installed—all of which takes energy and pumps out emissions. Even the so-called “green” options like bamboo or recycled wood still leave a carbon footprint.
That said, it’s not all doom and gloom. Some modern flooring is designed with the planet in mind—like when you source timber from responsibly managed forests. But no matter how eco-friendly the material, replacing your floor still leaves a bigger carbon footprint than simply sanding down what you already have.
So, if you want to go green, start by keeping what’s under your feet.
Aesthetic Outcomes
Looks matter. Whether you choose to sand your existing floors or replace them entirely, aesthetics will play a big role in your decision.
Potential to Achieve Desired Aesthetics with Sanding
If you’ve got solid wood floors, sanding will highlight the original grain and texture. Whether it’s oak, maple, or walnut, you’ll see all those rich details that were hidden under old varnish or grime.
It’s also a chance to switch things up. You can stain the wood to match your style. After a light, Scandinavian feel? Try a pale ash or whitewashed finish. Want something more striking? Go for dark tones like espresso or ebony to add a modern touch.
Once sanded, you’ve got options for the final finish. Matte gives a natural, rustic feel, while satin adds a soft, elegant sheen. If you prefer a sleek, polished look, a high-gloss finish will reflect light and brighten up the space.
But sanding has its limits though. If your floors are heavily damaged, warped, or too thin from previous sanding jobs, there’s only so much you can do. Also, you’re limited to the wood species you already have. You can’t magically turn pine into oak. And if you’re dreaming of intricate patterns like herringbone? Sanding won’t give you that—it’s time for a replacement.
Design Possibilities with New Flooring Materials
Now, if you’re after a complete transformation, floor replacement opens the door to numerous possibilities. This is where you can get creative and customise every aspect of your space.
Variety of Materials
With replacement, you’re not stuck with your current wood floor installation wood. You can switch from solid hardowod to engineered wood floor if you wish to. Even budget-frindly options like laminate that mimic wood, stone or tile.
Custom Patterns and Layouts
Want something unique? Floor replacement allows for custom patterns like herringbone, chevron, or parquet. These designs add instant sophistication and visual interest. You can also mix materials—think wood and tile combinations for a striking contrast.
Colour and Texture Variety
With new materials, the colour palette is endless. From cool greys and whites to warm browns and rich blacks, you can match your flooring to any interior style. You can even choose textured finishes, like hand-scraped or distressed wood, for added character.
Personal Preferences and Home Value
Your personal style and the value of your home are just as important. So, how do these options stack up when it comes to aesthetics and property value?
Impact on Property Value
Flooring matters when it comes to resale. It’s one of the first things potential buyers notice when they walk through the door.
Sanded and Refinished Floors
If your hardwood floors are in decent shape, a good sanding can work wonders. Think of it as a spa day for your floors—scratches gone, shine restored. Buyers love that natural wood look, and freshly sanded floors scream “move-in ready” without you saying a word.
But if your floors are more battle-worn—deep scratches, water stains, or warped boards—sanding won’t cut it. Buyers aren’t easily fooled by a quick cover-up, and dodgy floors could send them running (or at least knocking a chunk off their offer).
Brand-New Floors
On the other hand, replacing your floors can add even more value, especially if you’re upgrading to premium materials. High-end options like solid hardwoord, or engineered wood can turn heads and make your home stand out in listings.
If you’re in a competitive market, new flooring can give you an edge. Buyers love homes that feel fresh and modern, and a complete flooring update can make your home feel brand new. But remember—not all flooring adds value. Cheaper options might not have the same impact, especially in high-end homes.
Aligning Choices with Personal Style and Home Design
What about your own taste? Since you’re living in the premises, it should reflect what you truly desire.
Floor Sanding, Because Classics Never Go Out of Style
If you’re head over heels for the natural beauty of your current wood floor, simply sand the floor. This will bring out its grain and textures that have been hidden by years of wear and tear. All ready for the new treatments.
Feeling creative? You can totally switch up the style. Want a rustic, matte finish that whispers countryside charm? Or maybe a glossy, high-shine floor that screams modern chic? Either way, sanding lets you mix things up while keeping the soul of your home intact.
Original hardwood floors are a big selling point in older homes, and refinishing them can add both charm and value.
Floor Replacement for a Bold Statement
If you’re ready for a complete transformation, floor replacement has more possibilities. You can switch materials, colours, and patterns to match your vision. Want a Scandinavian-inspired space with light oak floors? Or maybe a modern, industrial look with dark, wide-plank engineered wood? Replacement gives you the freedom to reinvent your space.
New flooring also lets you address functional needs. If you need something waterproof for the kitchen or soft and warm for the bedroom, replacing your floors gives you the chance to choose the perfect material for each room.
Practical Considerations
Time and Convenience
How long will the project take? How much will it disrupt your daily life?
Duration of Floor Sanding Projects
To sand a standard-sized room (around 20 square metres), give it 1 to 2 days. That covers everything—the sanding process, applying the finish, as well as ensuring that the coats have sufficient drying time.
The total time depends on a few factors:
-
Type of finish:
Water-based finishes dry faster—sometimes within 2-4 hours between coats. Oil-based finishes? They can take up to 24 hours to dry between applications.
-
Condition of the floors:
For floors that are in decent shape, things will go fast. If there are deep scratches or expansive gaps that call for extra repair work, like filling, it may add some extra hours to the project. Extensive damage can call for a whole extra day of patchwork.
-
Dust-free floor sanding:
Here’s one way you can cut back on the time spent. There won’t be a cloud of dust making it difficult to see how the sander is being operated, and clean-up time after sanding is drastically reduced. That way, you can proceed with applying the new coats immediately after.
In most cases, you’ll be able to walk on the floors 24 hours after the final coat of finish. But don’t move heavy furniture back or lay down rugs for at least 48 to 72 hours to avoid damaging the fresh surface.
Duration of Floor Replacement Projects
For floor replacement, you’ll need to set aside a bit more time.It can take anywhere from a few days to a full week, depending on how tricky the job is.
Here’s what you’re looking at:
-
Removing old flooring:
This step alone can take 1 to 2 days, depending on what you’re pulling up. Old hardwood? That’s going to be more labour-intensive and time-consuming than something like laminate.
-
Subfloor preparation:
Once the old floor is out, the subfloor needs a good inspection. If it’s uneven or damaged, you’re looking at an extra day or two for repairs before the new floor can go down.
-
Installation and Finishing:
Hardwood flooring takes longer. Expect 3 to 4 days for a standard install. Longer if the wood needs more time to acclimate to the environment, and if the coats need more time to dry.
-
Finalizing:
After installation, there’s still cleanup, trim work, and final inspections to consider. That adds another half a day to the timeline.
In total, replacing your floors can take anywhere from 4 to 7 days for a single room, and longer if you’re redoing multiple rooms.
Disruption to Household Activities
Any floor project will disrupt your life, but the level of disruption varies significantly between sanding and replacement.
With floor sanding, you can usually stay in your home, especially if you’ve chosen dust-free floor sanding services. However, you will need to deal with the noise from the machines and walk carefully around freshly finished areas. Overall, though, the disruption is minimal. You might need to move furniture out of the room, but that’s about it.
Keep in mind that there are finishes that release strong odours, especially oil-based formulations. You’ll want to keep windows open or even spend a night away while the finish cures.
Things are different with traditional floor sanding and replacement. Here, you’ll have to vacate the rooms entirely. Depending on the scale of the project, you might even need to leave your home altogether for a few days. The duo combo of noise and dust will be overwhelming.
With kids and pets around, make arrangements for them. Yes, this may include relocating for that time period. Besides, little ones are naturally curious and will want to see what’s going on at different stages, and since heavy machinery is involved, they’ll be at high risk. If they can’t be relocated, involve the floor installation crew so they can take the necessary precautions during the project to keep your loved ones safe.
Health and Safety Considerations
Your own physical health is on the line, as well as that of the other people on the premises. The kind of germs they are exposed to during the floor restoration process makes it important to put proper safety measures in place.
Floor Sanding
Traditional floor sanding creates a staggering amount of dust. It’s not just the kind you see settling on your furniture. Fine wood particles get everywhere—into the air, your vents, and even your lungs.
Breathing in wood dust isn’t great for anyone. It can irritate your nose, throat, and lungs. If you’ve got asthma, allergies, or any other breathing issues, it can trigger serious flare-ups. Woods like oak and maple are known allergens. Even if you’re not allergic, you might find yourself sneezing, coughing, or dealing with skin irritation while sanding.
Did you know that wood dust is also a carcinogen? That’s not something you want yourself or your loved ones constantly exposed to. When sanding, fine dust particles can linger in the air and even circulate through your HVAC system for weeks. This can aggravate respiratory issues.
If you’re sanding your floors, opt for a dust-free floor sanding system. Open windows and use fans to keep the air moving—this helps reduce the dust in your home. These systems are becoming the standard for floor projects since they’re a cleaner, healthier alternative.
Floor Replacement
Cutting through that wood, dealing with power saws and sharp tools comes with it risks. One wrong move, and you’re risking a nasty cut or something worse.
What about all that heavy lifting?You’ll be haling around new materials as well as the boards being pulled out of the floor. Can your back handle it? During installation, loose boards, nails, and tools can create trip hazards. It’s easy to lose your footing, especially in cluttered workspaces.
Oh, and those adhesives and sealants? Many of them release VOCs (volatile organic compounds). These chemicals release harmful vapours that can cause headaches, dizziness, or nausea if inhaled in large amounts.
Make sure your tools are in good condition and that you know how to use them. Always follow manufacturer instructions and use safety guards where necessary. When lifting heavy materials, bend at your knees, not your back. If something feels too heavy, get help or use a dolly. Clear away debris and tools as you go. A clean workspace reduces the chance of accidents.
DIY vs. Professional Work
This brings us to the logistics of carrying out the entire project. The desire to take on by yourself can seem appealing. Floor restoration is not your average home improvement job. You can end up biting more than you can chew.
The Challenges:
-
Heavy equipment:
Floor sanders aren’t your average power tools. They’re heavy, bulky, and hard to control. If you’re not experienced, it’s easy to leave behind gouges or uneven patches.
-
Technique matters:
Sanding isn’t just about running the machine back and forth. You need to follow the wood grain, use the right grit sandpaper, and apply consistent pressure. One wrong move, and you could sand too deeply, damaging your floors beyond repair.
-
Dust everywhere:
Unless you rent a dust-free sander, expect dust in every corner of your home. And even then, some dust will sneak through. You’ll need to seal off rooms and cover furniture to prevent a massive clean-up job.
-
Finishing mistakes
: Applying the final sealant is another challenge. Too much, and you get sticky, uneven floors. Too little, and your floors won’t be properly protected. Air bubbles and streaks? They’re common for first-timers.
A similar case is seen with installations. You’ll need to measure and cut planks precisely, deal with uneven subfloors, and possibly nail or glue boards in place. Before laying any new floor, the subfloor must be perfectly level. Miss this step, and you’ll end up with creaky, uneven floors. Fixing subfloor issues can be complicated and time-consuming, even for experienced DIYers.
Benefits of Hiring Professionals
For one, you won’t have to worry about the intricacies of the job, and it will take a fraction of the time that would have been needed with a DIY approach. Professionals can handle all the floor sanding tasks, including making repairs to damaged sections. This is their bread and butter, and they are expertly trained for the job. Only by delivering quality results can they get repeat business, so they’re incentivised to get the task done to the highest standards.
The same goes for installation jobs. You want pros who know how to cut, fit, and lay materials with precision. That beats worrying about gaps, crooked lines, or creaky boards. They can also spot and fix any subfloor issues before they become serious, ensuring your new floors are level and stable. Plus, many installations come with warranties, giving you peace of mind. If something goes wrong, you’re covered—and you’ll rest easy knowing the job was done properly.
If you’re confident in your DIY skills, sanding or replacing your floors can be a rewarding project. But for complex jobs or valuable materials, hiring professionals is worth every penny. They’ll save you time, stress, and costly mistakes—leaving you with beautiful, durable floors that last.
General Floor Restoration Tips
This is the kind of job where you need protective gear at all times. We’re talking gloves, safety goggles, and a dust mask or respirator. Since sanders are loud tools, it’s worth getting some ear protection too. For the gloves, make sure they’re not loose—you don’t want them getting snagged by any machine.
Seal off your work area with plastic sheeting to stop dust, debris, and fumes from sneaking into other parts of your home. It’ll save you a lot of cleaning later and keep your living space safe.
Pace yourself. It’s a really physically demanding job. Take regular breaks, stay hydrated, and don’t rush. Tiredness leads to mistakes—and accidents.
Before you start, crunch the numbers. How much will it cost you in total? The materials, labour and tools, all included. Add a 10-15% buffer for surprises—because there’s always something.
Of course, if you hire professionals to handle the project, you won’t need to concern yourself with most of these nitty-gritties. Get at least three estimates from different contractors to compare prices and services. That gives you a range of what price is reasonable for your particular job. You can still save by doing some of the prep work yourself, like moving furniture.
Floor Sanding vs. Floor Replacement