
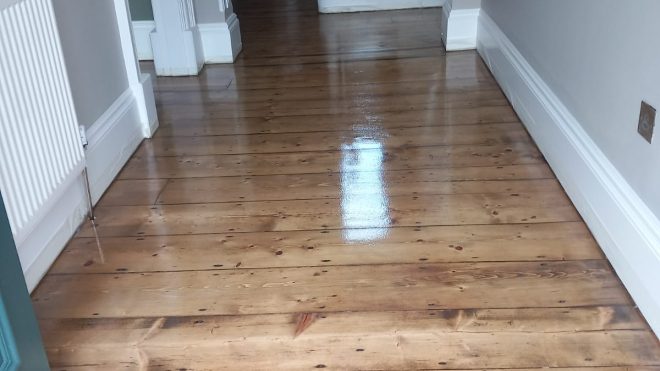
Floor Sanding Services for Landlords and Property Managers
If you manage rentals, you already know the floor does a lot of heavy lifting. It is one of the first things people notice at viewings, and then it takes the most day-to-day punishment once someone moves in. Scuffed hallways, dragged chairs, small spills, gritty shoes, pet claws, kids’ toys, suitcase wheels, you see it all. So even when the walls are freshly painted, a worn timber floor can still make the whole place feel tired.
That matters because void time is expensive. Every week the premises remains empty, your cashflow takes a hit.
At the same time, tenants often stay long enough for small floor issues to become big ones. RTB research found the average tenant has been renting in the private sector for 5.03 years, and has spent 3.44 years in their current home. That’s long enough for a “cheap fix” to come back and bite you.
This guide shows you how to decide when sanding is worth it, how to specify a rental-tough finish, and how to plan the work so you cut downtime without rushing.
Where Floors Eat Into Your Property Profits
Turnover, void days, and first impressions
When someone walks into a rental for a viewing, they do a quick “scan” before they read your ad details in their head. That’s where the two-viewing rule comes in: if a place doesn’t feel right in the first viewing, most people won’t come back for a second look unless the price drops or the location is perfect. And tired-looking timber floors can quietly push your property into the “too much hassle” category, even if everything else is fine.
Now link that feeling to money. One extra week vacant isn’t only “one week of rent gone”. It’s also:
- more time spent replying to messages and arranging viewings
- extra cleaning and touch-ups because foot traffic starts again
- more pressure to accept the first “okay-ish” applicant
- and sometimes a rent discount just to get the unit moving
The Residential Tenancies Board (RTB) reported the national standardised average rent at €1,696 for new tenancies and €1,452 for existing tenancies in Q1 2025. So even before you count ads, your time, or extra cleaning, a single vacant week can easily mean €335–€424 in straight rent loss.
And if you’re thinking, “I’ll just wait for the right tenant,” that’s fair. Still, presentation helps you do that without dragging the timeline. A well-presented unit tends to attract more serious applicants because it signals you maintain the place properly. As a result, you spend less time on no-shows and “maybe” viewers who are really just shopping around.
Tenant wear patterns
If you manage enough properties, you start seeing the same floor damage patterns again and again. The useful bit is that these patterns are predictable, so you can plan your floor strategy around how people actually live.
Student lets
- You usually get clear “traffic lanes” from the front door to the kitchen and living area, because people move in groups and carry bags, boxes, and sometimes bikes.
- Chair scuffs are common around dining tables and desks, especially where chairs scrape back and forth without pads.
- Party spills tend to show up as sticky patches near seating areas, or dark marks where liquid sat overnight.
Young families
- Small toy dents show up in clusters, especially in living rooms and bedrooms, because toys fall in the same play zones.
- Grit scratching is a big one: crumbs and tiny stones get walked through the house, and then the damage spreads as people move around.
- Pram wheels often leave marks in entry areas, especially if the pram is parked inside near the door.
Pet households
- You’ll often see micro-scratches near doors and favourite resting spots, because claws catch the surface over time.
- Water-bowl rings and “splash zones” are common, especially if bowls sit on timber rather than a mat.
- If pets jump on and off furniture, check the floor around sofas and beds for repetitive impact marks.
House shares
- Kitchens take the most strain: constant footfall, dropped cutlery, spills, and inconsistent cleaning habits.
- Drag marks show up where people pull chairs, small fridges, bins, or laundry baskets.
- Wear can be uneven because different housemates treat the same space differently.
Here’s a simple hotspot map you can check in any unit before viewings:
- hall-to-living path (the main “runway”)
- around the sofa and coffee table
- kitchen threshold and sink area
- under dining chairs
- bedroom doorway (especially the hinge side)
- near radiators (where people dry clothes and moisture lingers)
When you know what tenancy type you’re aiming for, you can predict where complaints will come from later, and you can decide whether a floor refresh is a “nice-to-have” or a “this will save you hassle” job.
Irish rental pressure and why “good enough” isn’t good enough
It’s tempting to aim for “grand, it’ll do” when you’re managing multiple units, especially if demand is strong. Still, the Irish rental market data shows exactly why small presentation decisions can have outsized effects.
Using the RTB data for Q1 2025, the RTB reported year-on-year growth of 5.5% for new tenancies and 4.4% for existing tenancies. Dublin’s standardised average for new tenancies was €2,186 (vs €1,669 in the wider GDA excluding Dublin, and €1,321 outside the GDA). So how costly “one more week of works” feels will vary based on your location.
What does that mean for you?
First, when rents are this high, tenants tend to be pickier because they feel the cost every month. So if your floor looks worn, you’re more likely to hear, “We’re going to keep looking,” even if the unit is otherwise decent.
Second, higher rents make void periods sting more. Even a short delay can wipe out the budget you thought you were “saving” by leaving a tired floor alone.
Third, if rents are rising year-on-year, you’re working in a market where speed-to-relet matters. You don’t want to be the unit that sits while others move quickly, because the viewing competition is often based on feel, not floorplans.
Sanding As A Value Tool
When you sand a timber floor in a rental, you are not doing it for “nice vibes”. You are paying for predictability. Sanding removes the surface layer that’s holding years of built-up problems: ingrained scratches, small dents, patchy old finish, and those dull traffic lanes that make the place feel older than it is.
That matters at viewings because sanding gives you a finish that looks even under harsh light. Instead of a room that looks fine in the corner but scuffed in the middle, you get a floor that reflects light more consistently across the whole space. As a result, photos look cleaner, and the unit feels better maintained the moment someone steps in.
It also changes your day-to-day management workload. A freshly finished, uniform surface is simply easier for tenants to live with. Dirt and grit still happen, of course, but cleaning becomes more straightforward because there aren’t sticky patches from half-failed coatings or rough areas that catch dust. You also cut down on the tiny complaints that eat your time: “The floor feels splintery near the kitchen door”, “The hallway looks stained”, “It’s impossible to mop without it looking streaky.”
Then there’s the portfolio angle. If you manage multiple units, sanding lets you standardise the same look and finish level across properties. That consistency helps you in three ways:
- you get more predictable tenant expectations (“this is how these units look”),
- you can keep maintenance instructions consistent across leases, and
- you can plan refresh cycles like a system rather than reacting to chaos.
What sanding will not fix (and how to spot it early)
Sanding is great for surface damage, but it will not fix building problems that are happening under the timber. If you miss those, you can spend money and still end up with a floor that fails again.
Here are the big ones sanding will not fix:
- Ongoing damp or leaks: if moisture is still getting in, the floor can warp or cup again after the work.
- Rotten or soft boards: sanding can’t turn damaged timber into solid timber.
- Major subfloor movement: if the floor feels bouncy or springy, the issue is structural, not cosmetic.
- Serious cupping caused by moisture: sanding a cupped floor before moisture stabilises is a bad bet. The moisture content of the wood and subfloor has to first stabilise.
- Pest damage: if boards are compromised, they often need repair or replacement, not sanding.
You can spot a lot of these in minutes during a walk-through. For example:
- a persistent musty smell can hint at trapped moisture, especially near external walls or behind furniture,
- recurring dark staining in the same zone often points to water, not “wear and tear”,
- damp around skirting boards is a classic warning sign in ground-floor rooms, and
- springy spots underfoot can suggest joist or subfloor issues.
Sand, recoat, patch-repair, or replace?
This is where landlords and property managers can save real money: choosing the right scope, not the biggest scope.
A simple way to think about it is: are you dealing with a worn finish, or damaged wood?
Recoat when the finish is tired, but the timber underneath is sound and reasonably flat. You are basically refreshing the protective top layer. You don’t always need a full sand to restore a floor. If there aren’t deep dents, heavy wear patterns, permanent cupping, or a colour change request, a “screen and recoat” can be enough.
Call in floor sanding services when scratches, stains, or unevenness are in the wood itself, or when old finish build-up has made the surface look patchy no matter how well it’s cleaned. This is also the route when you need to reset the look across a whole unit so it presents consistently.
Patch-repair when the damage is localised. Like one “bad run” of boards by the balcony door where water got in once, or a small section under a desk chair that’s been gouged. Targeted repairs can keep costs down and still get the unit looking sharp.
Replace when boards are structurally compromised, or moisture damage is repeating. If you’ve got ongoing damp, soft timber, or movement that comes back after repairs, replacement can be the cleaner long-term choice.
How Landlords Can Measure ROI of Floor Sanding Services
The “replacement trap”
When a timber floor looks rough, replacement can sound like the cleanest option. You pull it up, put something new down, and you’re done. In rentals, though, replacement often boxes you in because the headline quote is rarely the full bill.
Here are the costs landlords and property managers commonly forget to price in:
- Uplift and removal labour: pulling up boards, underlay, grippers, thresholds, and getting everything out of the unit. This usually takes longer than people assume, especially in apartments with lift restrictions or tight stairwells.
- Waste disposal and skip fees: once you remove flooring, you need to pay to get rid of it. If it’s mixed waste (old boards, underlay, trims), it can cost more and take more organising.
- Subfloor levelling and repairs: older rentals often have uneven subfloors, loose sections, or historic patch repairs. If you’re fitting new flooring, levelling becomes non-negotiable, because any bounce or dip shows up straight away.
- Thresholds, doors, and trimming: a new floor height can mean doors catching, thresholds needing adjustment, or trimming required. It’s a small thing that turns into a real delay if you discover it late.
- Redecorating edges: skirting boards, beading, and door frames can end up marked or chipped. Then you’re repainting and touching up “just around the edges”, which still takes time and coordination.
- Extra vacant days: replacement is rarely a “one trade, one day” job. It’s often removal → subfloor work → install → finishing touches → clean. If any stage slips, you lose rental days.
Now compare that with sanding-related cost drivers. Sanding isn’t free, of course, but the cost usually follows clearer levers:
- Room size and layout: bigger spaces and awkward shapes take more time.
- Repairs before sanding: replacing a few damaged boards, fixing squeaks, filling gaps, sorting thresholds.
- Access and logistics: parking, stairs, lift bookings, rules on working hours (especially in managed blocks).
- Drying and curing time: the finish you choose and the conditions in the property affect when you can safely move furniture back.
- Number of coats and finish choice: more coats usually mean more time, but also more resilience.
- Furniture handling: an empty unit is quicker. A furnished unit needs extra labour and planning.
So the “trap” usually looks like this: you choose replacement because you want a quick reset, but then hidden steps stack up, and your timeline stretches anyway. By contrast, sanding is often more predictable because you’re working with what’s already there, and you’re not creating a chain reaction of follow-on jobs.
Modelling payback
Here are a few simple models that connect floors to the things you already track: void time, callouts, and deposits.
Model 1: Void reduction (turnaround saved = rent saved)
Start with your rent level and the number of days you think sanding could save you compared to a messier option (or compared to leaving the floor as-is and struggling to re-let).
Use the RTB reference points as a benchmark:
- €1,696/month (new tenancies, standardised average)
- €1,452/month (existing tenancies, standardised average)
Convert to a daily figure (rough, but good enough for decisions):
- €1,696 ÷ 30 ≈ €56.50/day
- €1,452 ÷ 30 ≈ €48.40/day
Now run your own “days saved” scenarios:
- If sanding helps you re-let 5 days sooner, you’re looking at roughly €242 to €282 saved in rent (5 × €48.40 to 5 × €56.50).
- If it saves 10 days, that becomes roughly €484 to €565.
If you manage in Dublin, the stakes can be higher. €2,186 average rent comes to about €72.90/day (2,186 ÷ 30). Ten days saved there is roughly €729 in rent value.
Model 2: Maintenance-callout reduction (fewer tiny problems = fewer visits)
This one is about time and hassle as much as money. Floors in poor condition generate low-level issues that are annoying to handle:
- rough edges or splinters
- sticky patches where old coating is failing
- stains tenants can’t lift, so they assume the property is “unclean”
- complaint photos that force you into inspections
If sanding removes those friction points, you can often cut the number of “quick visits” you do over a tenancy. Even if each callout only costs you an hour and a bit of travel, it adds up across multiple units.
Tenancy length matters here. Like with an average of 5.03 years for the private rental sector, that’s long enough for small floor problems to keep resurfacing, especially in busy households.
Model 3: Deposit protection (clear condition = clearer outcomes)
Deposits get messy when the floor is inconsistent. If one room is dull, another is glossy, and the hall has patchy coating, it becomes harder to show what is normal wear and what is actual damage.
A consistent, freshly finished surface makes your check-in photos more meaningful. Then, at check-out, it’s easier to point to specific new damage (deep gouges, burn marks, heavy staining) rather than arguing about “it always looked like that”.
Use a decision matrix not gut feel
If you want a repeatable way to decide what to do, use a simple scoring matrix. It stops you making decisions based on mood, a pushy contractor, or a frantic vacancy.
Score each category from 1 (low) to 5 (high). Then add the totals and follow the recommendation band at the end.
A) Property and tenant fit (max 20 points)
- Property type and constraints: apartment blocks often have stricter working hours and noise sensitivity.
- 1 = easy access, flexible hours
- 5 = strict rules, tricky access
- Tenant profile likelihood: student let, house share, pets, young kids, heavy footfall.
- 1 = low wear household
- 5 = high wear household
- Traffic intensity: narrow hallways, open-plan living, direct kitchen access from entry.
- 1 = light traffic layout
- 5 = constant traffic lanes
- Letting speed pressure: do you have a fixed move-in date or a tight letting window?
- 1 = flexible
- 5 = urgent
B) Condition score (max 25 points)
- Scratches and dents: are they surface-level or through to bare wood?
- 1 = light scuffs
- 5 = deep damage
- Stains and discolouration: water marks, pet stains, dark patches.
- 1 = none
- 5 = widespread or recurring
- Flatness and movement: squeaks, bounce, gaps, cupping.
- 1 = stable
- 5 = unstable or warped
- Moisture indicators: musty smell, repeated marks in the same area, damp at edges.
- 1 = no signs
- 5 = strong signs
- Previous work history unknown: if you don’t know how many times the floor has been sanded, the risk goes up.
- 1 = known history
- 5 = unknown history
C) Operational practicality (max 15 points)
- Furniture volume: empty unit vs fully furnished.
- Access: stairs, lifts, parking, distance to unit.
- Neighbour sensitivity: complaints risk during works.
D) Risk score (max 20 points)
- Likelihood of rework: will a rushed option fail quickly?
- Tenant disruption risk: occupied works vs vacancy works.
- Finish failure risk: humidity, ventilation, drying conditions.
Interpreting your total
Use these bands to decide your next step:
- 60 to 80: Do now (you’re likely losing money or creating repeat issues by delaying).
- 40 to 59: Do at next vacancy (plan it, price it, line up access and timing).
- Below 40: Monitor and recoat (you probably don’t need full sanding yet, but keep a close eye on traffic zones).
To keep this grounded in Irish rental realities, tie your decision back to rent value and tenancy length (such as with the national average rents we’ve mentioned). Even small delays have real cost. Your floor choice needs to last longer than a single letting cycle.
Pre-sanding Inspection Checklist For Rentals
A proper pre-check before hiring floor sanding services saves you from the nightmare scenario: you pay for works, you lose letting days, and then the finish fails because something underneath was never fixed.
Here’s your inspection checklist.
Timber thickness and board health
You don’t need to know how to sand. What you do need is the ability to spot whether the floor is even a good candidate for sanding.
Start by looking for signs of previous sanding and thinning:
- Nail heads getting close to the surface: if you can see or feel nails near the top, the floor may have very little “meat” left.
- Thin-looking edges or uneven board lips: run your hand across board joins. If edges feel unusually low or rounded, it can be a sign the floor has been taken down before.
- Beading and skirting gaps that look “too big”: sometimes repeated sanding lowers the floor slightly, and the trim no longer sits neatly against it.
Then check board health:
- Loose boards: walk slowly and listen for clicks or creaks that happen in one spot repeatedly. Mark them with masking tape so you don’t forget later.
- Splits and cracks: look closely around doorways and beside radiators, because timber can dry out and split in these stress areas.
- Impact damage: heavy dents from dropped objects or dragged furniture often need board repair, not just sanding, because deep damage can show through even after refinishing.
- Gaps that are new or widening: gaps can be seasonal, but sudden changes can also hint at moisture swings or movement.
Photo checklist for contractor quotes (so you can compare like-for-like)
Before anyone prices the job, take these photos (wide + close-up):
- Each room from all four corners (shows layout and access).
- Every doorway threshold and transition strip (trip-risk zones).
- Close-ups of deep dents, black stains, splits, and gaps (repair scope).
- One photo showing any nail heads or metal close to the surface.
- The worst “traffic lane” in the hall or living area (wear pattern).
- Any lifted edges or cupping (moisture clue).
- Under appliances (washing machine area if accessible), and beside radiators.
This set makes it much harder for quotes to be vague, because the contractor can see what you see.
Moisture and building issues that ruin finishes
Moisture is the biggest reason a newly finished timber floor disappoints later. In Irish rentals, you’ll often deal with a mix of intermittent leaks, older underfloor voids, and lifestyle-driven moisture (like drying clothes indoors with poor ventilation).
First, check the “usual suspects”:
- Plumbing history: ask yourself what’s happened in this unit before. Has there been a washing machine leak, a dishwasher overflow, or a bathroom seal failure?
- Radiator valves and pipework: look for staining on the floor near radiators or damp marks on skirting boards.
- Balcony doors and thresholds: door seals fail quietly. Water can track in during heavy rain and sit on the timber edge.
- Washing machine area: even a slow drip can create a dark patch that keeps spreading.
Then decide when to delay works. You should pause if you have:
- active leaks or damp patches that are still changing week to week,
- an unresolved moisture source,
- fresh plaster that hasn’t dried properly,
- or clear cupping that looks moisture-driven.
There’s a well-known “don’t rush it” warning from wood flooring guidance: cupped floors should not be sanded until the moisture content of the wood and subfloor has stabilised.
A simple prevention mini-plan (so the finish lasts longer)
Because the average rental has 3.14 occupants, moisture and traffic build up quickly, especially in halls, kitchens, and near bathrooms, you need to set a basic prevention routine after the floor sanding and restoration:
- Ventilation expectations: put it in the tenant welcome pack. “Use extractor fans during showers and cooking, and open windows briefly when drying clothes indoors.”
- Extractor fans: check they actually work, and that tenants know where the switch is (you’d be surprised how often this trips people up).
- Condensation hotspots: ask cleaners to look for repeated window condensation and damp corners at turnover, because it’s an early warning sign.
- Fast spill reporting: make it easy for tenants to report leaks and spills quickly, because moisture damage is cheapest when it’s caught early.
Safety, accessibility, and compliance-sensitive details
Floors aren’t only about looks. They’re also a common source of complaints because slips, trips, and sharp edges are the kind of issue tenants report immediately.
Start with trip hazards:
- Raised thresholds and uneven transitions: check every doorway where timber meets tile, carpet, or laminate. Even small height differences can catch toes, especially in low light.
- Lifted edges and proud boards: these can happen near radiators, doors, and high-traffic lanes. Mark them for repair.
- Cables and loose mats: if you provide mats, make sure they sit flat and don’t creep.
Then check splinters and sharp edges:
- Run your hand along the timber where people walk barefoot: bedrooms and near bathrooms are big ones.
- Check around damaged boards. A single split board can become a cut risk, and it’s the kind of thing tenants will mention when they’re unhappy about something else too.
Now look at slip risk zones. Entryways and kitchens are the big ones because moisture gets tracked in.
Documentation habits that save you hassle later
Treat documentation like part of the job, not an optional extra:
Before works
- Date-stamped photos of every room, plus close-ups of existing damage.
- Notes on any movement, squeaks, thresholds, and known leak history.
After works
- Photos in the same positions as before (so comparisons are clean).
- A short “floor care” sheet for tenants: what cleaning is OK, what to avoid, and when the floor can be wet-cleaned after curing.
- A clear move-in record. You want the starting condition to be crystal clear for the whole tenancy.
When you do this inspection properly, you’re avoiding rework, complaints, and the kind of delays that eat your rental income.
Floor Finishes That Survive Rentals
When you’re choosing a finish for a rental, you’re basically choosing what kind of problems you want to deal with later: scuffs, stains, smell, downtime, or tricky repairs. So instead of getting lost in product talk, it helps to think in “finish families” and what they’re known for.
- Water-based surface finishes (clear film finishes)
These are often picked when you care about shorter downtime and a more neutral look. They are normally clear, very durable, and quick-drying. That combination is handy if you manage high-turnover units where every day matters.
Many waterborne finishes dry to touch in roughly 1–4 hours, can be dry-to-sand in 4–12 hours, and have a typical cure time of 3–7 days, depending on temperature and humidity.
- Oil-based surface finishes (ambering film finishes)
These are often chosen for that warmer tone and a tough “sealed” feel underfoot. Oil-based finishes are typically amber in colour and very durable.
The trade-off is usually odour and time. If you’re trying to turn a unit around quickly, you’ll want to be stricter about ventilation and your handover schedule.
- Conversion varnish and moisture-cured finishes (very tough film finishes)
These as extremely durable options, with moisture-cured finishes often being more moisture-resistant than other surface finishes. They’re usually a “pro-only” choice and tend to suit properties where you want maximum wear performance and you can plan access and drying properly.
- Natural/penetrating oil systems (soak-in finishes)
These behave differently. Instead of forming a thick film on top, they penetrate the wood, which can make local repairs easier in many cases. Natural oil finishes can be maintained with periodic refresh applications and that repairs often blend well after maintenance is done.
The trade-off is that they can be more maintenance-sensitive, meaning your tenant guidance and your planned refresh cycle matter more.
How to match finish to unit type:
- High turnover (student hostels, house shares, frequent re-lets): you’ll usually value faster drying, lower disruption, and easier “standardisation” across units.
- Long lets (families staying years): you’ll usually value wear resistance, stain resistance, and fewer future callouts, even if cure time is longer.
Sheen, colour, and “tenant-proof” aesthetics
If you want fewer complaints and fewer panicky “the floor is ruined” messages, avoid finishes that make normal living look like damage.
Ultra-gloss shows everything
Glossy floors reflect light like a mirror, which means every tiny scratch, swirl, and dusty footprint looks louder than it really is. In rentals, that turns everyday wear into a constant visual problem, especially in hallways and living rooms where traffic is unavoidable.
Very dark tones can be a maintenance trap
Dark floors can look amazing on day one, but they also tend to highlight pale dust, grit scratches, and uneven touch-ups. That’s not what you want in a unit with an average of over 3.14 occupants, where traffic builds up faster and cleaning habits vary.
So what’s the safer spec?
- Go mid-tone to lighter tone if your goal is “looks clean even when life happens”. These tones hide fine dust and micro-scratches better.
- Choose a forgiving sheen (many landlords pick something in the matte-to-satin range) because it reduces glare and makes day-to-day marks less obvious.
- Keep the look consistent across rooms if you manage a portfolio. When you standardise colour and sheen, future repairs and refresh coats are simpler because you’re not trying to match three different looks in one property.
A big point that gets overlooked is patch visibility. Even when spot touch-ups are possible, they don’t always match perfectly. Spot touch-ups may be possible but may not look the same as a total recoat. That’s why “boringly consistent” is often the smartest choice for rentals. It gives you more options later without a full redo.
Slip resistance, stain resistance, and cleaning compatibility
A rental finish isn’t only about durability. It’s also about how the floor behaves when it’s wet, dirty, or cleaned badly (because yes, tenants will try things).
Start with slip risk, especially at entrances. Some form of contamination is involved in almost all slip accidents, and even small amounts of water or dust can create a slip problem on smooth floors. For instance, when the matting at the entrance is too small, it won’t catch enough tracked-in rainwater during wet periods, and the floor needs more frequent cleaning. Water gets walked in, and smooth finished timber can turn slippery when it’s wet.
So build this into your spec and tenant pack:
Rental-friendly “allowed / not allowed” cleaning rules:
- Allowed: dry sweeping or vacuuming with a soft floor setting, then a lightly damp mop (not soaking).
- Not allowed: steam mops and flooding the floor with water. Those are common causes of moisture trouble and finish wear.
Remember that dry and cure times are affected by temperature and humidity, which is another reason to avoid wet cleaning too early after finishing.
Add physical protections that cut damage at the source:
- Entry matting: treat it like part of the floor system. If you reduce grit and water at the door, you cut scratching and slip risk.
- Felt pads under chairs: dining chairs are one of the biggest scratch factories in rentals.
- Chair protectors for desk setups: house shares and students create constant chair movement.
- A “no dragging” note: moving furniture by dragging is one of the quickest ways to gouge a finish.
Handover standard (so the finish actually hardens properly):
- Ask your contractor for the finish manufacturer’s schedule, but as a general reference, waterborne finishes often cure in 3–7 days.
- Rugs generally shouldn’t go down until the finish is fully cured, often 7 to 30 days, depending on the finish.
- Note that some finishes can take up to 30 days to fully cure. It’s a simple but important reminder that “dry to the touch” and “fully cured” are not the same thing.]
Finally, tie your finish choice back to your actual business pressure. The finish that fits your turnaround and tenant type is often the best financial decision, not the fanciest one.
Floor Sanding And Restoration Turnaround Between Tenancies
When you’re between tenancies, your biggest enemy is a messy schedule. A floor job can look “quick” on paper, and then you lose days because someone walked on it too early, painters kicked up dust, or appliances got dragged back in before the finish had time to harden.
It helps to run the turnover like a simple pipeline:
Day 0 (keys in): inspection, photos, moisture checks
- Walk the unit with a phone torch and take date-stamped photos of every room, door threshold, and any damage you’re already aware of.
- Do a quick moisture sense-check where problems normally hide: around the washing machine space, under windows, beside radiators, and at balcony/door thresholds.
- Decide the scope right away (repairs, sanding, coats), so you’re not debating it three days later.
Day 1–2: repairs first
- Get board repairs, squeaks, loose thresholds, and any gap/fill decisions done before sanding starts.
- If there’s any sign of moisture-driven cupping, pause and sort the moisture source first.
Day 2–4: sanding, then coats
- Sanding first, then finishing/coats.
- Plan coats so you’re not forcing drying in a cold, closed-up unit. Drying and cure times depend on temperature and humidity, so don’t assume the same timeline every season.
Curing window (this is where landlords lose time)
- A lot of water-based finishes are dry-to-touch quickly (Roughly 1–4 hours) and can be dry-to-sand in 4–12 hours, but the typical cure time is still 3–7 days depending on conditions.
- Rugs are often recommended to wait until the finish is fully cured, commonly 7 to 30 days depending on the finish system.
Final clean → staging photos → listings
- Do your final clean after the finish is safe for light foot traffic, then take fresh photos for the listing.
- Aim to list as soon as the unit is presentable, not when every last detail is perfect.
Doing floor works in occupied units (when you must)
Sometimes you can’t wait for vacancy. Maybe the tenant renewed and you promised to sort the floor, or you’re managing a long-let where timing is tight. If you have to do it occupied, treat it like a risk project, not a normal job.
Start with clear expectations:
- Agree working hours in writing (especially if the tenant works from home). RTB research found 78% of tenants are in employment, so daytime disruption is a real issue.
- Set a daily access plan: which rooms are off-limits, where furniture will be moved, and where the tenant can safely walk.
- Talk about noise and dust honestly. You’ll need dust containment, but no system is perfect, so tenants should plan around it.
Then build in extra time and money:
- Occupied jobs usually mean more labour (moving furniture in stages), more visits, and a higher chance of delays because spaces must stay usable.
- You also have a higher risk of accidental foot traffic on fresh coats, which can lead to rework.
It’s often a bad idea when:
- the tenant has a baby, allergies, or pets that can’t be easily kept out of work zones,
- the unit has moisture risk you haven’t fully diagnosed,
- the layout is open-plan with no way to isolate rooms,
- you’re trying to meet a tight deadline (rushing finishes is where you get regrets).