
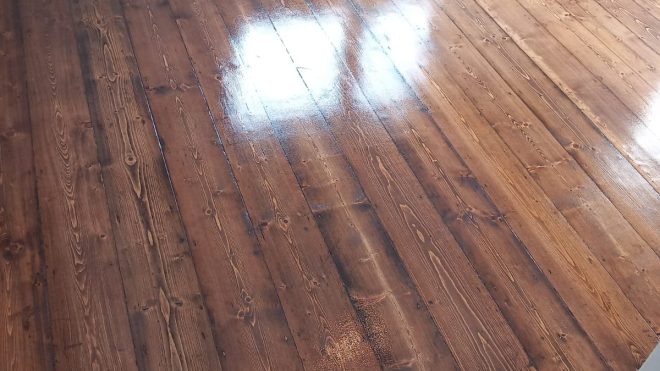
19 Floor Sanding Mistakes That Cost Irish Homeowners Thousands
Floor sanding can look straightforward at first glance. However, if you get the prep wrong, choose the wrong sanding steps, or rush the finish, you can end up paying twice, first for the job, and then for the fix. In Ireland, professional sanding typically ranges at around €25–€35 per m², depending on the floor and the condition, so even a “small” mistake across a few rooms can quickly become a serious bill.
This matters even more because Irish homes deal with moisture swings all year. For example, Autumn 2025 brought 493 mm of rain, about 134% of the long-term average, making it the 4th wettest autumn in 85 years. When moisture is part of your reality, “common” sanding and finishing errors are far more likely to show up later as gaps, cupping, patchy sheen, or peeling.
In this guide, we’ll look at the mistakes that lead to re-sanding, board replacement, or a full rip-out. You’ll also see the money impact, and learn the practical checks that help you avoid the same traps. Also learn how to keep the job safer, because sanding machines can create very high dust levels that are a threat to everyone on the premises.
The Financial Stakes
Baseline costs
Most people begin with a simple budget: sand the floors, add a fresh finish, job done. It can start at €15–€20 per m² for sanding only, and reach the €30s per m² for sanding and varnishing.
So far, so normal. However, your final quote can climb quickly if the job includes repairs (loose boards, squeaks, splits), heavy staining, parquet patterns, stairs, tight edges, or moisture-related issues. Those extras matter because they add labour time and they can also change the sanding approach entirely.
The “second bill” people don’t budget for
Where homeowners get stung is the second bill. That’s the money you pay after a mistake shows up.
First, there’s re-sanding, which isn’t always a clean reset. If too much wood has already been removed, you may not have enough thickness left to safely sand again, especially on older floors that have been refinished before.
Next, there’s replacement of sections, which sounds small until you add it up. A “small repair” can turn into boards, thresholds, trims, skirtings, and door adjustments (because sanding + finishing slightly changes floor height). Then you’ve got the decorating knock-on: scuffed walls, paint touch-ups, and time spent moving furniture out and back in.
Let’s look at three scenarios:
Scenario 1: DIY chatter marks → professional re-sand + extra finishing coats
Say you sand a combined 45 m² (a sitting room, hall, and a bedroom). If your local going rate lands near €25 per m² for sanding and varnishing (a mid-point inside the common Irish ranges above), your original professional bill would’ve been roughly €1,125. If DIY sanding leaves visible ripples and chatter marks, a pro may need to re-sand and then recoat, and you’re suddenly staring at another four-figure cost. Even if the “fix” is cheaper than the full job, you’ve still paid for two rounds of disruption.
Scenario 2: Finish fails → strip-back + recoat + living disruption
If the finish peels or goes patchy because the floor wasn’t cleaned properly between stages, you might not need heavy sanding again, but you could need a strip-back or abrasion and multiple new coats. Now add the practical cost: you may have to move furniture out twice, rearrange your routine twice, and lose use of key rooms twice. That’s the kind of “hidden” cost people feel most.
Scenario 3: Moisture surprise → sanding wasted because the cause wasn’t fixed
This one is brutal: the floor looks better right after sanding, then movement, gapping, or finish issues start appearing because the moisture source was never solved. At that point, the sanding money is basically spent, and you still have to pay to fix the underlying issue before you can even think about refinishing again.
Why replacement has become a bigger financial hit in recent years
Even when you want to replace damaged boards and move on, the wider building market affects what you’ll pay. The CSO reported that overall building and construction activity (by volume) was up 7.8% in Q3 2025 versus Q2 2025, and up 18.1% year-on-year. Within that, residential building volume rose 4.7% quarter-on-quarter, while non-residential building rose 10.1%.
When activity is that strong, trades are busy, scheduling gets tighter, and prices can feel less predictable. On top of that, the CSO’s Wholesale Price Index notes that construction product prices rose 1.0% in the 12 months to November 2025, and the Building and Construction Index (materials and wages) was 2.0% higher than a year earlier. So if a sanding mistake forces you into repairs or partial replacement, you’re dealing with a market where costs and availability can move around more than you’d like.
So sanding isn’t expensive only because of the first quote. It becomes expensive when a mistake triggers a second round of work, extra materials, extra labour, and extra downtime in your home.
What “Good Sanding” Actually Looks Like (So You Can Spot Bad Decisions Early)
If you’re going to avoid expensive mistakes, it helps to know what a good sanding job looks like before anyone touches a machine. That way, you can spot bad calls early, not when the finish is already drying.
The correct sequence
A proper job follows a clear order, because each step sets up the next one.
It starts with inspection, where you (or the floor sanding service team you’ve hired) checks board thickness, loose sections, old coatings, stains, and any signs of moisture trouble. After that comes repairs, because sanding a floor that’s moving, squeaking, or lifting is like painting a cracked wall. Next is protection and dust control, which means sealing off doorways, covering vents, and planning how dust will be captured and cleaned.
Only then does the sanding begin: sanding stages (multiple passes), followed by edging and blending so the perimeter matches the centre of the room. If the floor needs it, there’s filling for small gaps and nail holes, and then final sanding to level everything out. After that, the floor needs proper cleaning (not just a quick hoover), then sealing/finishing, and finally curing time, when the room stays off-limits long enough for the finish to harden properly.
That sequence matters because skipping early steps usually creates problems you can’t “fix” later with extra coats.
The three outcomes a good job must achieve
When sanding is done well, you’ll notice three things right away:
- Flatness
You shouldn’t see ripples, waves, dips, or that awkward “edge shelf” where the border looks slightly higher or lower than the middle. A simple way to check is to stand near a window or shine a light low across the floor. If it looks like small hills, something went wrong.
- A clean surface
The wood should feel smooth and dry, with no greasy patches, old polish residue, or dust trapped in the grain. This is the part people underestimate, because dust left behind can end up locked into the finish and show up as gritty texture or dull patches later.
- Finish integrity
The finish should bond properly and cure properly. In other words, it shouldn’t just look good on day one. A strong finish doesn’t stay soft, doesn’t peel at the edges, and doesn’t mark easily when normal life returns.
Ireland’s climate makes moisture control very important. Wood reacts to indoor humidity swings, and you’ll usually get steadier results if your home sits around 40%–60% relative humidity, with roughly 20–23°C being a comfortable band for wood stability.
One more point: sanding dust is not harmless. The Irish Health and Safety Authority classifies hardwood dust as a carcinogen, and it sets an occupational exposure limit value of 2 mg/m³ for hardwood dust (8-hour average) after January 2023, with 5 mg/m³ set for softwood dusts. Even if you’re not “at work” on a site, it’s still a good reminder that dust control and proper clean-up aren’t optional extras in your own home.
Pre-sanding Mistakes: The Problems You Can’t Sand Out
The big money-wasters often happen before the first sanding pass, because you can’t “sand your way out” of the wrong floor type, hidden moisture, or basic prep issues.
Mistake 1: Assuming every timber floor can take a full sand
A lot of Irish homeowners only discover this the hard way: not every “wooden floor” has enough real wood on top to survive a full refinish.
Some floors are solid boards, which usually have more sanding life in them. Others are engineered, meaning there’s a top “wear layer” of real timber, bonded to a core (often plywood or similar). The catch is that only the wear layer can be sanded. Engineered wear layers can range from roughly 0.5 mm to 6 mm, which is a massive difference in how much you can safely remove.
So what does “too thin to sand” look like in real life?
- You can see the tongue along board edges or in doorways where there’s been past sanding. That’s a red flag because it usually means previous sanding already removed a lot of the top layer.
- The floor flexes or feels springy in spots. Movement isn’t just annoying, it also makes sanding uneven and can crack fillers and finishes later.
- The board thickness isn’t consistent, especially in older homes where repairs were done over time. You might have one area that can take a light refinish and another that can’t.
A simple rule of thumb: if the wear layer is around 2 mm, it may only tolerate about two sandings, while a 6 mm wear layer may cope with around five to six refinishes. You don’t need to memorise those numbers, but you do need to respect the idea behind them: if your floor is thin, a “standard” sanding plan can push it past the point of no return.
How you avoid it: if you don’t know what you have, get a proper assessment before you spend money. That can be as simple as checking a threshold or vent area where you can see the profile, or lifting a small trim where safe. The goal is to confirm the floor type and top-layer thickness before anyone commits to aggressive sanding.
Mistake 2: Skipping moisture checks because the floor “feels dry”
Wood doesn’t need to feel damp to be sitting in a moisture problem. In fact, plenty of moisture issues in Irish homes show up as slow damage over time rather than puddles on the surface.
This matters because damp and moisture problems are very common. In a major Irish ageing study, 46.3% of participants reported damp, mould, or moisture as a problematic housing condition. That same report found housing problems were more likely in older dwellings: 64.9% in homes built pre-1940, compared with 51.4% in homes built 2001 or later. So if you’re in an older Irish house, it’s sensible to treat moisture as a likely factor, not a rare one.
Common Irish triggers before sanding include:
- Ground-floor slabs and concrete subfloors that haven’t fully dried or don’t have an effective barrier.
- Old ventilation routes blocked off (airbricks sealed, vents covered, chimneys closed up).
- Historic leaks that were fixed, but left moisture trapped in subfloors or joists.
- Cold rooms and condensation, especially in period homes or poorly ventilated bedrooms.
How you avoid it: start with a simple screening routine before you commit to sanding.
- Check for musty smells, dark edge staining, or white, powdery residue near skirtings.
- Look underneath where possible (even a small inspection point helps).
- If you’re on a slab, take extra care. The moisture content of a substrate (like plywood/OSB or concrete) should be below 5% before wood flooring work. Higher moisture increases the risk of cupping over time.
Also, if you have a timber subfloor, moisture still matters. If a timber subfloor moisture content is higher than about 12%, extra measures may be needed. Higher-moisture battens and rough timber are unsuitable.
Mistake 3: Sanding over contamination (polish, wax, old cleaners, paint spots)
If your floor has ever been “freshened up” with wax, polish, certain oil soaps, or even repeated use of strong cleaners, sanding can turn into a mess.
Here’s what usually happens:
- Residue clogs abrasives, so you burn through sanding sheets faster.
- Heat and friction can smear contamination into the grain, so instead of removing it, you spread it.
- Later, when you coat the floor, you can get patchy sheen, adhesion issues, or weird dull spots that appear when the light hits at an angle.
This is also where people waste time and wood. When the surface looks uneven after the first sanding pass, the instinct is to sand more. However, more sanding on a contaminated surface can make the problem harder to clean up because the residue gets pushed deeper and wider.
How you avoid it: treat contamination like a separate task. Before sanding, identify what’s on the floor:
- If water beads in odd patches, that can suggest polish or wax.
- If it feels slightly greasy even after cleaning, that’s another clue.
- Paint flecks and old filler blobs should be dealt with carefully rather than dragged across the floor by a machine.
The mindset here is basically: remove the gunk first, then sand clean wood.
Mistake 4: Leaving the floor physically unprepared
This one sounds obvious, yet it’s one of the biggest reasons floors end up with gouges and uneven edges.
If you start sanding while you still have:
- Protruding nails, tacks, staples, or raised screws,
- Loose boards that shift under pressure,
- Squeaks and bounce from a weak subfloor,
- Chipped edges that catch the machine,
…then you’re basically feeding problems into the floor sanding process.
How you avoid it: fix movement first, cosmetics second.
- Walk the floor slowly and mark every squeak, bounce, and loose spot.
- Sort fixings and stability before you touch a sander.
- Only after the floor is stable should you think about gaps and surface appearance.
That order matters because a stable floor sands more evenly and behaves better under a finish.
Mistake 5: Not planning the room and the logistics
Even if your floor is sandable and dry enough, poor planning can still cost you.
A few common “gotchas” in Irish homes:
- Doors that scrape after sanding and finishing. Even a small change in height can cause rubbing, especially on older doors that already sit low.
- Skirting and trim choices left until late. If you plan to replace skirting, that changes how you handle edges and expansion gaps.
- Thresholds and fireplaces that need a decision early, not mid-job.
- Radiator pipes and tight corners that can slow everything down and lead to rushed workmanship.
Then there’s the house-wide practical side. If you don’t plan dust containment properly, it travels. That’s a bigger issue in open-plan spaces where air moves easily between rooms.
How you avoid it: plan your “living setup” before you plan your sanding.
- Decide which rooms will be out of action and where furniture will go.
- Seal off the work zone properly.
- Sort doors, trims, and thresholds as a checklist item before day one, not as a surprise on day three.
If you get these pre-sanding checks right, you’ll start the job on solid ground. After that, the sanding and finishing decisions become much easier, because you’re not fighting problems that were baked in from the start.
Sanding Technique Mistakes: How Floors Get Gouged, Rippled, and Uneven
This is the part where floors get permanently “wonky” looking, even if the finish later goes on perfectly. Sanding isn’t about brute force. Instead, it’s about controlled removal and a scratch pattern that gets finer in a predictable way.
Mistake 6: Starting too aggressively (wrong first grit)
When you start with a grit that’s too coarse, you don’t just remove the old finish faster. You also carve deep scratches into the wood. Then, even after you move to finer papers, those scratches can hang around and show up later as long lines or dull tramlines when the light hits the floor.
Your first cut should be the finest grit that still achieves the job, because that reduces how much scratch damage you need to remove later. When you hire professional floor sanding services, the team will choose the first grit based on things like existing coatings, how uneven the floor is, the wood species, and the overall condition.
If your floor is fairly flat and you’re mainly removing an old clear coat, starting at something like 60 grit might make sense. However, if there’s heavy finish build-up, cupping, or deep damage, you might need to start at 40 grit. What tends to go wrong is when people jump straight to 36 grit “to save time” on a floor that didn’t need it. You might feel like you’re flying through the work, but you’ve created scratches that now demand extra passes and extra wood removal to clean up properly.
How you avoid it: test a small area first (somewhere that will be covered by furniture later). Start finer than you think, check the result, and only go coarser if you have to. The aim is steady progress without digging trenches into the floor.
Mistake 7: A bad grit sequence (or skipping steps)
If the first grit choice is about not over-scarring the floor, the grit sequence is about actually removing the scars you made.
A grit sequence is a system. Each step is supposed to remove the scratches from the step before it. When you skip a grit, you make the next grit’s job harder, because it’s trying to remove scratches that are too deep for it to comfortably handle.
A sequence like 36 – 60 – 100, the 60 grit can struggle to remove the 36 grit scratches. In other words, the “shortcut” often creates extra work and leaves scratch marks that show later.
If your final cut needs to be around 80 grit, a typical sequence might look like 36 – 50 – 80 rather than hopping over key steps.
How you avoid it: treat each grit as a checkpoint.
- After each pass, change your viewing angle. Open curtains, then look across the floor with light coming from the side. Scratches show up faster in raking light than in overhead light.
- Use the “feel test” as well as the eye test. Run your hand lightly with the grain. If you feel sharp scratch texture, the previous grit’s marks are still there.
- Don’t move up a grit until the floor looks consistent. A patchy scratch pattern now becomes a patchy floor later.
Mistake 8: Drum/roller control errors that create valleys and waves
Even if you pick the right grit and sequence, you can still ruin the surface profile with machine control mistakes. These are the ones that create dips, ripples, and stop marks, and they’re the reason a floor can look “wavy” under sunlight.
The most common causes are simple:
- You pause with the drum/roller engaged for even a moment.
- You turn too sharply while the machine is cutting.
- You move at an inconsistent pace (speeding up and slowing down).
- You apply uneven pressure, especially when you’re tired and trying to “push through” the last bit.
Surface lines like chatter marks and swirls points come from a mix of setup, pressure, sequence, and patience, and that correcting them usually means adjusting technique rather than just hoping finer paper will hide them.
You can also get the edge “shelf” effect without realising. That happens when the centre of the room gets sanded more than the perimeter (or the other way around). Visually, it can look like the room has a subtle border that sits at a different height, especially near windows.
How you avoid it:
- Keep your passes overlapping consistently, not randomly.
- Keep the machine moving before you lower it into the cut, and keep it moving as you lift out.
- Change direction smoothly, not with tight pivots.
- If you see a stop mark forming, don’t keep sanding over it aggressively. Instead, back up, feather the area gently across multiple passes, then re-check in side light.
Mistake 9: Poor edging and blending (the most visible “amateur tell”)
Edges are where a lot of DIY jobs give themselves away. You can have a beautiful centre section, then walk to the skirting and see a darker band, swirl marks, or a slight dish where the edger has dug in.
There are three basics: follow the correct grit progression, keep the edger flat and moving, and blend the perimeter into the main field. Check your work under side lighting so you can see swirls before they’re sealed in.
Corners and tight spots are where overworking happens. You get stuck, you press harder, and you create a shallow bowl. Later, finish reflects differently in that “dish” and it looks like a permanent shadow.
How you avoid it:
- Use the same logic as the main floor: coarse enough to remove old finish, then progressively finer.
- Don’t try to make the edger do everything. For corners and awkward areas, hand sanding or a small detail sander is often cleaner than forcing an edger into a tight angle.
- Blend, then re-check. If your edges look “separate” from the field, you’re not finished yet, even if you’re tired of sanding.
Mistake 10: Ignoring the pattern and grain (especially parquet/older boards)
Direction matters because scratch visibility depends on how the fibres are laid out. With straight floorboards, sanding against the grain can create scratches that are hard to remove and easy to see later. The scratches and gouges are difficult to remove. Sanding with the grain supports a smoother result.
Parquet is a special case, because the grain changes direction block by block. That’s why many parquet guides recommend working at an angle rather than trying to follow a single grain direction. For example, you can sand across the pattern at around a 45-degree angle for better results, then finishing with fine grits like 100–120 for a smooth surface ready for sealing.
How you avoid it:
- For floorboards: aim to finish your final passes in a direction that makes sense with the boards and the main light in the room, so scratches don’t “flash” when sunlight hits.
- For parquet: treat it like a pattern, not a row of boards. Start by cutting diagonally across the pattern rather than trying to chase the grain of each block. Then, as you move to finer grits, focus on evening out the scratch pattern so it looks consistent across the whole floor.
If you get these technique choices right, you set yourself up for a floor that looks flat and clean in daylight, not just “nice enough” under a ceiling light at night.
Finishing Mistakes: Why New Finishes Fail Within Months
A lot of floor disasters happen after sanding, when the surface looks “done” and you’re tired, you’re over it, and you just want your home back. That’s exactly when tiny finishing mistakes can ruin adhesion, trap moisture, or leave the surface soft and mark-prone.
So, if you want a finish that still looks good a year from now, not just next week, these are the traps to avoid.
Mistake 11: Poor cleaning between stages (dust is the silent saboteur)
After floor sanding, the surface can look spotless and still be covered in fine dust. That dust is sneaky because it gets into the grain, sits in corners, and then mixes into your sealer or varnish. Later, it shows up as gritty texture, dull patches, tiny bumps (“nibs”), or patchy sheen that drives you mad when sunlight hits it.
A practical standard you can follow is: vacuum and tack the floor clean, then repeat tacking until the floor is clean. Here, cleaning isn’t one quick pass; it’s a repeat-until-it’s-right job.
What “clean enough” looks like in real life
- Vacuum slowly, using a bare-floor setting (not a spinning brush that can flick dust back into the air). Go with the grain and then across it, because dust likes to hide in the lines.
- Hit the edges and radiators deliberately. This is where dust builds up and later falls into wet finish like pepper on chips.
- Tack/wipe lightly, not soaking wet. You’re aiming to pick up remaining dust, not reintroduce moisture.
And since we’re talking about dust: it’s not only a cosmetic issue. Your health is on the line.
Even though you’re not running a worksite, it’s still a strong reminder to take dust seriously, ventilate, and clean properly before you start coating.
Mistake 12: Rushing drying and recoat windows
Finishes can be “dry to touch” long before they’re ready for another coat. If you recoat too soon, you risk trapping moisture or solvents, which can show up as cloudiness, wrinkling, softness, or weak bonding. On the other hand, if you wait too long between coats, some finishes won’t bond properly without a light abrasion, and that’s when peeling or flaking becomes more likely later.
This is where Ireland’s climate can quietly mess with your plans. National data shows annual rainfall in Ireland in 2024 hit 1,228 mm (in 2023 it was 1,511 mm), and it’s getting wetter. More damp outside often means more humidity inside, especially in older houses, and that can slow drying and curing. Recoating has to be properly timed.
- If the room feels cool and “heavy” and windows are fogging, your finish may take longer.
- If ventilation is poor, vapours hang around longer, and drying can drag.
A simple way to stay out of trouble is to keep the room in a stable comfort range while coatings dry, which leads neatly into the next mistake.
Mistake 13: Applying finish too thick, too thin, or inconsistently
This one causes heartbreak because it can look fine at first and then fail under normal living.
If you apply coats too thick:
- The surface can stay soft for longer, so it scuffs easily.
- You can get roller marks, lap lines, and uneven sheen.
- Furniture feet can leave imprints that don’t fully bounce back.
If you apply coats too thin:
- Wear paths show up quickly in hallways and around sofas.
- You get less protection against grit, spills, and everyday abrasion.
Inconsistent application is the most common issue in homes, because you might slow down in awkward areas, rush near doorways, or “go back over” a section that’s already starting to tack up. That last habit is a big one: once a finish begins to set, overworking it can leave texture and visible lines that don’t level out.
A practical approach is to work in clear lanes, keep a wet edge, and avoid “fixing” tiny imperfections mid-coat. If you spot a small bit of dust or a hair, it’s usually better to let the coat dry, then deal with it properly before the next coat rather than dragging it through wet finish.
Mistake 14: Temperature and humidity not controlled during finishing
Wood and finishes both behave better in stable conditions. If you reduce wood movement, you’re less likely to see cracks or gaps opening up.
Realistic home tactics that help
- Keep heating steady rather than blasting it for two hours and then turning it off.
- Ventilate in a controlled way (short bursts can be better than leaving everything wide open on a wet day).
- If your home struggles with damp, a dehumidifier during curing can help keep conditions steady (especially in ground-floor rooms).
Mistake 15: Putting the room back into service too early
This is the classic one: the floor feels dry, so you bring everything back in, roll the sofa over it, throw down a rug, and start cleaning like normal. Then a week later you’re staring at dull tracks, dents, or a weird patch where the rug sat.
Dry and cured are different things. Curing takes longer. Water-based finishes may cure in about 7–10 days, while oil-based finishes may need 10–14 days. Bring your home back to normal in stages, even when you’ve gone the route of hiring professional floor sanding and refinishing services:
A staged “back to normal” plan:
- First 24 hours: keep foot traffic minimal and gentle. Socks are safer than shoes.
- After 48–72 hours: you can usually start light use, but avoid dragging anything, and keep pets from sprinting and skidding.
- Around 7 days: you’re often in a safer zone for moving heavier furniture carefully and adding felt pads. Rugs are still worth delaying if the room is cool or humid.
- After 10–14 days (often safest for rugs in slower-drying conditions): rugs and heavier “normal life” are less likely to cause marks, especially in rooms that run damp.
Mistake 16: Ignoring health and safety during finishing
Finishing isn’t only about looks, it’s also about what you breathe and touch while the work is happening. Coatings can release vapours as they’re applied, as they dry, and even as they cure. Solvents can make you ill through breathing vapours, and there are also skin contact risks like dermatitis.
If you end up redoing a finish because of poor ventilation or dust contamination, you’re not only spending more money, you’re also adding more materials and waste. So, treat ventilation, sensible protective gear, and keeping kids and pets out of the room as part of finishing properl. It protects your lungs, your skin, and your final result.
Moisture, Cupping, Gaps, and Peeling
Moisture is one of those things that can quietly undo a great sanding job. You might look at your floor a month after refinishing and think, “This was perfect… what happened?” Often, it’s not the sanding at all. It’s the wood reacting to changing humidity in your home.
How wood moves across Irish seasons
Wood is always trying to match the moisture in the air around it. When indoor air gets more humid, boards absorb moisture and expand. When indoor air dries out (often during heating season), boards shrink. Over time, that movement shows up as:
- Cupping: board edges lift a little higher than the centre
- Crowning: the centre rises and the edges drop
- Seasonal gaps: fine lines between boards that appear in winter and soften again later
- Edge lift and micro-cracks: small changes that can stress the finish, especially at joins
Ireland’s climate makes those swings more likely. Met Éireann’s analysis shows Ireland has become about 0.7°C warmer and roughly 7% wetter when comparing 1991–2020 with 1961–1990. And we’ve already mentioned how Autumn 2025 was the 4th wettest autumn in almost a century. In fact, six of the ten wettest autumns have occurred since 2001.
A simple goal that works well for most timber floors is keeping your indoor relative humidity around 40% to 60%, with a room temperature in the region of 18°C to 23°C.
The USDA Wood Handbook shows that when a building stays roughly in the 30%–50% RH range, wood tends to sit around 6% to 9% moisture content, which limits expansion and contraction. At 40% RH, wood can sit around 7.7% moisture content.
Stable indoor humidity keeps the wood’s internal moisture steadier, and steadier wood tends to behave better under a finish.
Common moisture pathways homeowners miss
Long-term moisture trouble usually comes from boring everyday causes, not dramatic floods.
- Ground-floor moisture: even without visible water, lower rooms can run more humid, especially if ventilation is weak.
- Condensation: you’ll often see it first on windows, but it can also feed damp into corners and behind furniture where air doesn’t circulate.
- Slow leaks: tiny leaks under sinks, radiators, or around washing machines can raise moisture locally for weeks.
- Ventilation habits: drying clothes indoors with little airflow, keeping trickle vents closed, or never using extractor fans can push humidity up.
- Blocked subfloor vents in older homes: older properties can be more prone to damp conditions.
If you have underfloor heating, moisture management matters even more because heating can dry the boards quickly and create wider gaps. Bring temperatures up gradually (for example, increasing by 1°C per day). The wood floor surface temperature should not exceed 27°C.
How to keep the floor stable after the work
You don’t need a complicated setup. You just need a few steady habits.
- Monitor your indoor humidity: Pick up a basic hygrometer and keep an eye on the number. If you’re regularly outside 40%–60% RH, your floor is more likely to move.
- Avoid big swings: Instead of blasting heat for a short period and letting rooms cool again, aim for gentler, steadier heating. Then ventilate in controlled bursts, especially on very wet days, so you don’t pull in loads of damp air.
- If you have underfloor heating, ramp slowly: Go up in small steps rather than jumping from off to high. Remember to stay under the 27°C wood surface limit.
- If symptoms return, don’t rush to sand again: If you see new cupping, widening gaps, or finish stress, treat it like a moisture and environment problem first. Check humidity, look for leaks, and review ventilation and heating patterns. Once the home is stable again, you can decide what the floor needs, but re-sanding too soon can turn a manageable issue into a costly one.
If you keep your home’s moisture steadier, your refinished floor usually stays calmer too, and that’s how you protect the money you’ve already spent.
DIY vs Professional Floor Sanding, Plus How to Hire Well if You Do Go Pro
Floor sanding is one of those jobs where the cost isn’t only the first price you see. Instead, the real risk is paying for a redo because the plan didn’t match the floor, the room, or your home setup.
A useful way to decide if you will hire a contractor or go it yourself is to think in two buckets: how complicated your floor is, and how much disruption you can realistically handle.
When DIY can be reasonable
DIY can be a decent option when the job is small and predictable. For example, if you’re working on a single box room or spare bedroom with straightforward boards, minimal repairs, and no fancy edges, you can sometimes get a good result if you’re patient.
However, the biggest “DIY requirement” isn’t skill on day one. It’s your ability to go slowly and stop if things aren’t going well. You’ll need time for prep, time for multiple sanding passes, and time for proper clean-up and drying. You’ll also need the physical stamina to keep your pace consistent, because tired sanding is when mistakes creep in.
A quick self-check that helps:
- Can you keep the room out of action for longer than you’d like?
- Can you live with “good enough” rather than showroom-perfect?
- Can you pause the job halfway through if you spot a problem, instead of pushing on to “finish it”?
If the answer is yes, DIY may suit you. If the answer is no, then it’s best to outsource it.
When DIY is most likely to cost more
DIY gets risky when the floor has “complication multipliers”, meaning small errors become hard to hide and expensive to correct.
DIY is more likely to cost you more when you have:
- Parquet floors, because the pattern and edges are less forgiving (and any unevenness stands out fast).
- Stairs, because edges, corners, and safety matter, and the work is slow and awkward.
- Deep staining, because it tempts you to sand aggressively and remove too much wood.
- Uneven subfloors or bouncy sections, because movement can ruin a flat finish.
- Unknown floor history, especially where the floor may already have been sanded multiple times.
- Moisture-risk rooms, like ground floors that feel cold, older homes with ventilation quirks, or rooms with past leaks.
If your house sits in areas where damp, mould, or moisture as a housing issue is common, DIY isn’t impossible, but you’ll want to be extra cautious about committing to sanding before the home conditions are steady.
The hidden DIY costs people don’t count
DIY budgets often forget the repeat costs. You might price the hire and think you’re sorted, then the “little extras” start stacking up.
Here are the ones that catch people out:
- Abrasives used faster than expected. If your floor has old residue, heavy finish build-up, or stubborn patches, sandpaper can clog quickly, and you’ll buy more than you planned. (That doesn’t always show up in the first DIY spreadsheet.)
- Extra finishing materials. If a coat goes on patchy or gets contaminated, you may need additional product for another coat, and you’ll also lose time waiting for drying again.
- Disposal and clean-up. If you end up replacing sections, waste handling becomes part of the cost.
- Room downtime and “doing the move twice”. Moving furniture out, storing it, then moving it back is real effort. If a DIY job runs long or needs a redo, you’ll feel that disruption more than you expected.
One more thing: health and dust control can add cost. You will need to budget for proper containment, masks, and a serious clean-up.
If you hire a professional: How to avoid expensive misunderstandings
Hiring isn’t only about finding someone available. It’s about agreeing on what you’re paying for with the floor sanding services.
When you’re comparing quotes, ask for these specifics in writing:
- What area is being measured and charged? Confirm m² and whether closets, landings, or alcoves are included.
- What repairs are included and what aren’t? Loose boards, splits, thresholds, trims, squeaks. Spell it out so you don’t get surprised mid-job.
- How many coats are included, and what finish system is being used? You don’t need brand names, you just need the plan: sealer yes/no, number of top coats, and expected drying time.
- Who moves furniture and removes doors? If you assume they do it and they assume you do it, you lose a day.
- Aftercare guidance. Ask them to put curing and “back to normal” timing in writing, so you don’t accidentally mark the floor.
Then ask about dust and safety in a way that matches your household:
- If you have kids, asthma, or anyone sensitive to dust, ask what they do for containment and clean-up, and how they reduce dust migration into the rest of the house.
Finally, your own “quality checks” don’t need special tools:
- Look at the floor in natural light, especially near windows, to spot uneven reflection.
- Check edges and doorways, because that’s where rushed work shows first.
- Run your hand lightly over a few areas to spot roughness before it’s sealed into the final result.
If you choose DIY, you’re basically managing time and risk yourself. If you hire a professional, you’re managing clarity. Either way, the money-saving move is the same: match the approach to your floor and your home, not to what you wish the job would be.
Aftercare Mistakes: How People Ruin a Freshly Sanded Floor
Once your floor looks gorgeous, it’s tempting to treat it like a “normal” floor straight away. Still, a lot of costly damage happens in the weeks after sanding, simply because everyday habits come back too quickly.
Mistake 17: Cleaning too aggressively too soon
The most common aftercare slip-up is too much water. Even on a sealed floor, repeated wet mopping can slowly push moisture into joins and edges, and steam cleaning is even harsher because it combines heat and moisture.
Routine cleaning should be sweeping/dust mopping or vacuuming on a bare-floor setting, and you should avoid wet mops and steam mops because they can damage the finish and wood over time. Use a well-wrung microfibre mop and avoid bleach and vinegar as well.
So what does “damp” actually mean? It means your mop should feel barely moist, not wet enough to leave a sheen of water behind. If you can see droplets, streaks of water, or puddling at board joins, you’re using too much.
So fo routine maintenance, dry-clean most of the time (microfibre dust mop or vacuum), then only damp-clean when needed, and always dry any spill straight away with a cloth.
Mistake 18: No protection in high-wear zones
Grit is basically sandpaper for your finish. It’s why hallways, kitchens, and back doors look tired first.
What’s striking is how much dirt arrives on shoes. Up to 80% of dirt in a building is tracked in on footwear. Entrance matting systems can stop up to 95% of dirt from travelling further indoors when they’re properly set up.
That means your simple“floor protection plan” is:
- Put proper mats at every entrance you actually use.
- Consider a shoes-off rule in high-traffic seasons.
- Add felt pads under furniture legs and avoid dragging anything heavy.
- If you have pets, keep nails trimmed so you’re not carving micro-scratches into the finish.
Also, be careful with rug underlays. Some non-skid pads can imprint their pattern into the finish over time.
Mistake 19: Ignoring early warning signs
Small problems are easier (and cheaper) to stop early. Watch for:
- Dull walk paths that appear quickly in one lane
- Sticky patches that feel tacky underfoot
- A white haze after cleaning
- Tiny lifted edges where the finish looks like it’s starting to peel
When you notice any of these, don’t reach for stronger cleaners. Instead, first switch back to dry cleaning for a week, then clean only with a suitable wood-floor cleaner and a lightly damp microfibre mop. If a patch is still getting worse, that’s your cue to get it assessed early, because a simple maintenance recoat is far less painful than starting the whole sanding process again.
If there’s one reassuring thing to take away, it’s this: the most expensive floor sanding disasters usually come from predictable mistakes at predictable stages. When you know where things go wrong, you can catch problems early, before you’ve burned through wood thickness, time, and money.
So, start with a proper assessment. Check what you’re working with, especially if your floor is engineered, older, or has been sanded before. Then sand with a clear system, because skipping grits or pushing too hard is how chatter marks and deep scratches get locked in. After that, finish with patience. Dust, rushed recoat timing, and unstable room conditions are common reasons finishes fail long before you expect them to.